We've Moved!
We've unified our Vasion Print (formerly PrinterLogic) and Vasion Automate documentation into a single, streamlined resource to better serve you. Visit our new unified documentation site: docs.vasion.com
Note: This legacy site will not be updated after January 6, 2025, and will remain available for reference until May, after which all traffic will automatically redirect to docs.vasion.com/a/Get_Started/Automate.htm.

Last updated: January 07, 2025
CPA Manager
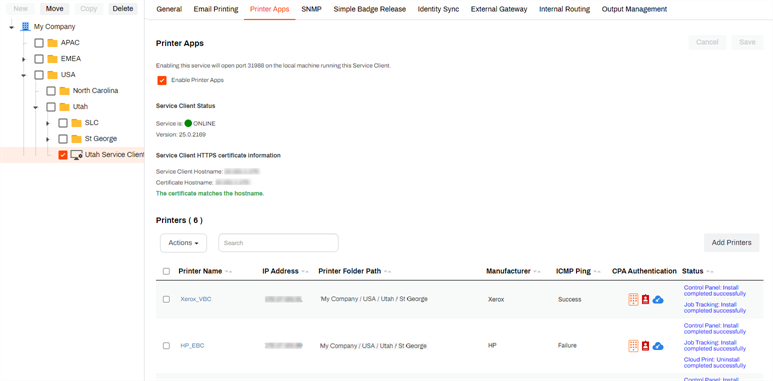
The CPA Manager, located on the Service Client's Printer Apps tab, is used to simultaneously install applications on multiple printer objects from the same manufacturer. In addition, it provides a status overview of each installed application across your network, including which printers have the application installed on them.
Access the CPA Manager
You can access the CPA manager by selecting the Service Client machine managing your printer apps service from the tree structure in the Admin Console and selecting the Printer Apps tab.
CPA Manager Details
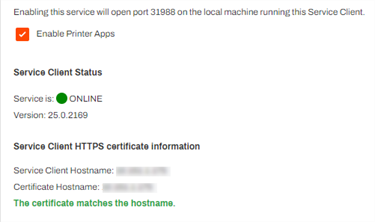
The top of the tab shows the following:
- The option to enable the Printer Apps service.
- The Service Client status.
- Status indicator — displays green for online, red for offline.
- The current Service Client version.
- Service Client HTTPS certificate information.
- The Service Client Hostname / IP Address.
- The Certificate Hostname / IP Address.
- The Certificate status — whether or not the certificate matches the hostname.
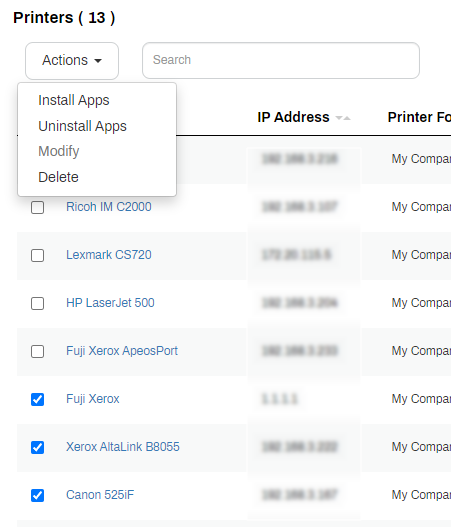
Printer List
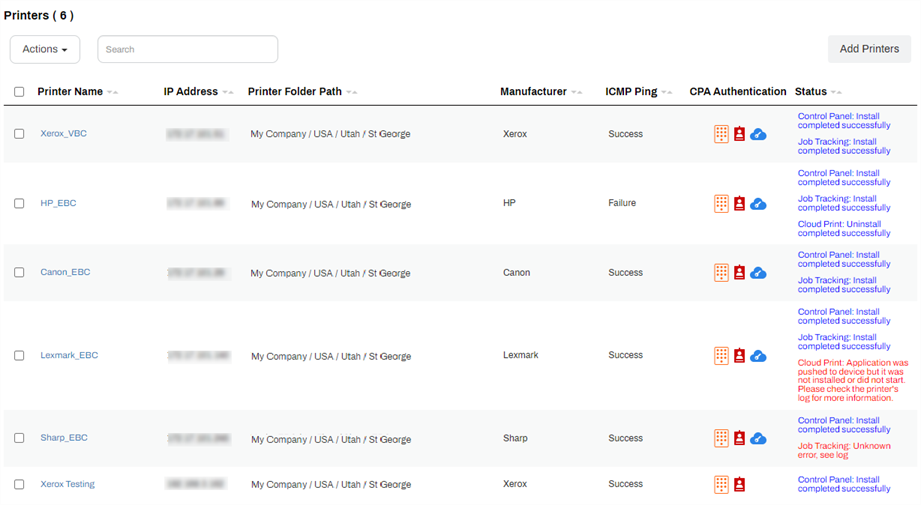
The bottom part of the Printer Apps tab displays the list of printers that have applications installed and are being managed by the Service Client in a table format. You can select any column heading to sort in ascending or descending order. The amount of printers added to the CPA Manager displays above the Actions drop-down.
- Printer Name — the name of the printer object as defined on the tree structure. Select the name to open the printer object.
- IP Address — the printer object's IP Address.
- Printer Folder Path — shows the folder path of the printer object's location.
- Manufacturer — the printer object's device manufacturer.
- ICMP Ping — the printer object's current ICMP status to indicate connectivity between devices. The ping intervals match those set for your SNMP status monitoring settings.
- CPA Authentication — lists an image that depicts the type of authentication configured for use with the object. Hovering your mouse pointer over the image provides the image's description.
 — Username and Password authentication.
 — PIN authentication.
 — Badge authentication.
 — Single Sign On
- Status —lists messages about the printer object's current status and, in some cases, past status. These messages can help determine errors blocking installation, the current progress of the installation, and if you previously had the application installed.
Enable the Printer Apps Service
- Navigate to the Printer Apps tab on the Service Client.
-
Select Enable Printer Apps.

- Select Save
- Access the physical device designated as the Service Client.
- Use the system tray icon or start menu to "Refresh Configurations".
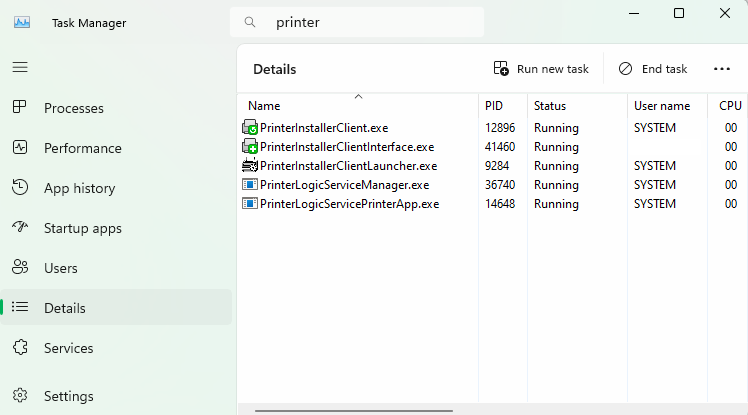
- Open Task Manager and select the Details tab.
- In the Search field type "printer" to locate the Client processes.
- Verify the following services.
- Client services (PrinterInstallerClient.exe, PrinterInstallerClientInterface.exe, PrinterInstallerClientLauncher.exe).
- PrinterLogicServiceManager.exe.
- PrinterLogicServicePrinterApp.exe.
- Other enabled services on the Service Client will also show.

Add a Printer
There are two way to add printers for installation.
- Select the printers from a list.
- Browse and the printers from the tree structure. By using the tree structure, you can select a folder, which will automatically select all printer objects contained within it.
Select Printers
When working with multiple printers, they must all be from the same manufacturer.
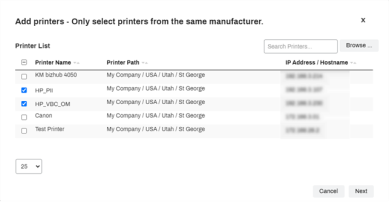
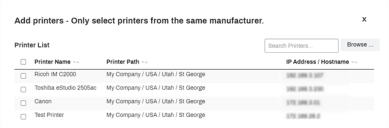
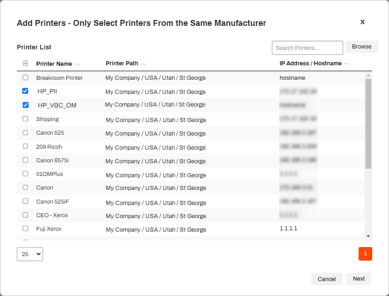
- Select the Add Printers button.
-
Select any printers from the list as long as they are from the same manufacturer, then select Next.
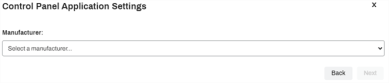
-
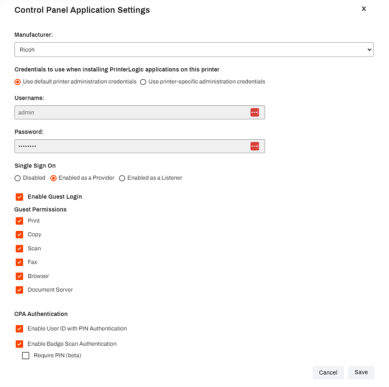
Select the Manufacturer from the drop-down list.
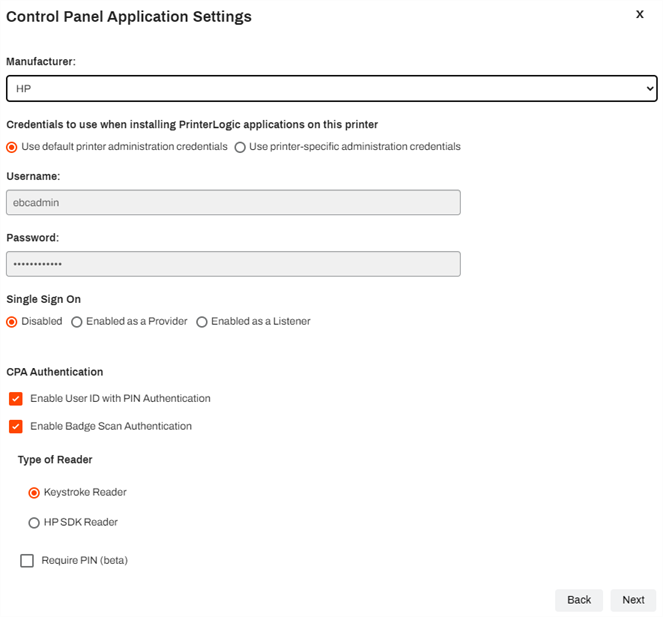
-
Select the desired settings to apply to all printers selected, then select Next. The options displayed vary by manufacturer.

If you use an IdP, the Control Panel Application (CPA) only supports badge and PIN authentication.
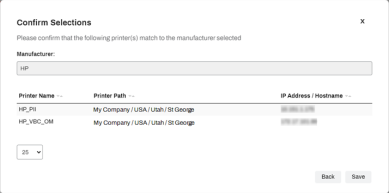
-
Confirm all the printers are from the same manufacturer, then select Save.
-
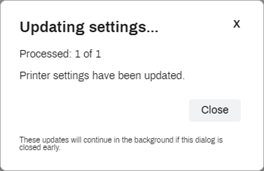
Select Close on the Updating settings... modal. The installation process continues in the background and may take some time.


The printers display on the list and you can view the current status under the Status column.
Browse for Printers
-
Select the Add Printers button.
-
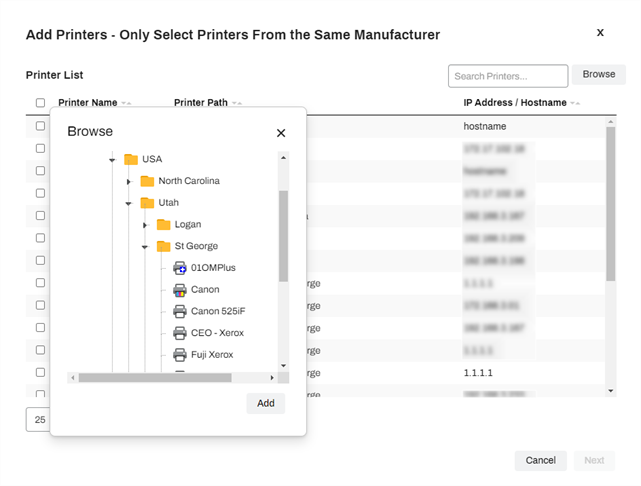
Select the Browse option.
-
Open the tree structure to the printer(s) or folder you would like to add to the CPA Manager list. Once selected, select Add.

You can use the Ctrl and Shift keys to select multiple folders and printers. All selected printers must be from the same manufacturer. Only select a folder if all printers within that folder are from the same manufacturer.
-
Once the selected printers are displayed, select Next.
-
Select the correct manufacturer from the drop-down list.
-
Select the desired settings to apply to all printers selected, then select Next.
-
Confirm they are from the same manufacturer, then select Save.
-
Select Close on the Updating settings... modal. The installation process continues in the background and may take some time.


The printers display on the list and you can view the current status under the Status column.
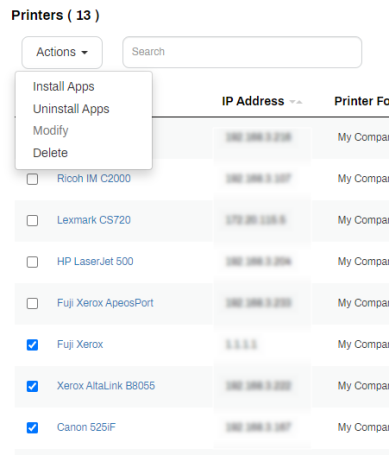
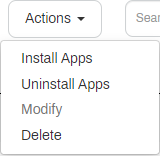
Action Options
You can perform specific actions depending on printers selected from the CPA Manager list. Each action may rely on things such as if the chosen items are like manufacturers or if the printers will support the action based on configuration. The actions become available when a printer is selected.
Just because a printer appears in the list does not mean it is ready to have the App installed. The list includes any printer associated with the Service Client.

- Install Apps — installs the CPA or Off-Network Cloud Print (ONCP) app onto printers. when the printer is added correctly, you can install multiple CPAs or ONCP apps to printers regardless of the manufacturer.
- Uninstall Apps — uninstalls apps from the printers. You can uninstall multiple apps regardless of the manufacturer.
- Modify — this option is only available if you select printers from the same manufacturer. You can modify the printer's admin credentials, SSO or CPA authentication options.
- Delete — removes the printer definition from the Service Client, which in turn removes the Service Client from the Printer Apps. If you delete a printer here, the Apps tab on the printer will no longer list the Service Client. It does not delete the printer from the tree structure. You can remove multiple items at once.
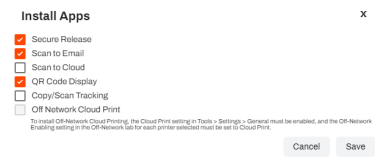
Installing Apps
When working with multiple printers, they must all be from the same manufacturer.
- Select the printer(s) you want to install apps on.
-
Select Install Apps.
- Select from the following apps, as long as they are enabled and have met all the requirements.
- Direct Secure Release.
- Scan To Email, if your printer supports Simplified Scanning.
- Scan To Cloud, if your printer supports Simplified Scanning.
- QR Code Options.
- Copy/Scan Tracking.
- Off-Network Cloud Print
-
Select Save
Depending on the features selected, the process can take time. You can refresh the page to show status changes.
-
Select Close on the Updating settings... modal. The installation process continues in the background and may take some time.

Once the install(s) completes, the status is updated to Control Panel / ONCP: Install completed successfully. Hovering over the CPA Authentication icons describes the option.
Uninstalling Applications
When working with multiple printers, they must all be from the same manufacturer.
-
Select the printer(s) where you want uninstall the application.
-
Select Uninstall Apps.
-
Select the options to uninstall, then select Save.
Depending on the features selected, the process can take time. You can refresh the page to show status changes.
-
Select Close on the Updating settings... modal. The uninstallation process continues in the background and may take some time.

Once the uninstall(s) completes, the status will be updated to Control Panel / ONCP : Uninstall completed successfully. The status always displays in blue writing to indicate that you successfully uninstalled the application at one point.

Modifying Configurations
When working with multiple printers, they must all be from the same manufacturer.
- Select the printer(s) to modify application settings for, then select Modify.
-
Make the application settings adjustments as needed, then select Save.

Delete Printers
- Select the printer(s) to delete.
- Select the Delete option.
- In the confirmation modal select OK.
Troubleshooting Help
Is an Identity Provider Configured?
The CPA requires the use of an IdP. This can be LDAP or another IdP such as Entra ID (Azure AD), Okta, etc.
Check the Default Printer Admin Credentials
Are the default printer admin credentials correct?CPA installations can fail if the admin username and password are incorrect. You can resolve this issue by modifying the credentials used for CPA installation. With the Modify option in the CPA Manager, update the credentials for multiple printers as long as they are the same brand. Often, the default admin name and password are the same multiple manufacturers.
Is There a Self-signed Certificate?
At a minimum, the printer requires a self-signed certificate. If an Amazon Root CA 1 certificate is not installed, follow this link to see the steps to obtain the certificate so you can manually install it on the printer.
Is There a Time Difference Between the Service Client and the Printer?
If a certificate did not authorize, it could be because a printer is in a different time zone than the Service Client hosting the Printer Apps. When the Service Client pushes out the CPA application with the certificate, due to the time difference, the certificate may be expired.
You can reach the info page to check the timezone in two ways:
- Log in to the CPA, then tap on the PrinterLogic logo at the top.
- Install the CPA with Extended Debug mode enabled, then tap on the PrinterLogic logo at the top (without the need to log in first).

Check the Network Settings
- Verify that the IP Address assigned to the printer is accurate within the Admin Console.
- Ensure that you can successfully ping the printer from the Service Client machine.
Are You Using a Universal Print Driver?
Sometimes printer-specific drivers can cause installation issues for the CPA. Use a universal print driver to ensure a smooth and successful installation.
This is a generic communication error. A few things to check are:
- The Service Client is not listening over port 31988. Update the configuration to allow listening over port 31988.
- The printer does not trust the Vasion Print (formerly PrinterLogic) certificate. Register or upload a new certificate.
Fuji Xerox Specific
In the printer settings, configure the Domain Name within the DNS Configuration settings to see if it resolves.
The CPA requires a Service Client to install apps to the printer. Check that the Service Client machine is not shut down or in an error state.
On the machine, open the Task Manager and select the details tab. In the Search field, type "printer" to locate the Client processes.
If neither the PrinterLogicServiceManager.exe or PrinterLogicServicePrinterApp.exe processes are running on the Service Client device, verify the Client installation and / or check the Service Client was installed properly.
Verify the Client Installation
Verify the Client is installed, authorized and pointing to the correct instance. A quick test is to click the system tray icon to open the Self-service Portal. If it opens to the correct URL, you can sign in, and see / install printers from the portal, then the client is authorized.
If you're prompted for an authorization code in the Self-service Portal, see Device Authorization for steps on how to create one.
If the Self-service Portal opens to an incorrect URL, you'll need to set the home URL. See Update the Client Home URL.
Verify the Service Client Configuration
Navigate to C:\Program Files (x86)\Printer Properties Pro\Printer Installer Client\ServiceHost. and check the following:
If the Service Host folder is not created, check the machine's hostname or IP address and compare with what you entered for the Service Client in the Admin Console.
If the folder is created, check the config folder in it. A token.json file is saved here when the Service Client is authorized.
If the folder is created, but the token.json file is not there, you need to reauthorize the Service Client, see Reauthorization Steps. Please note that the Service Client authorization is different from the Client authorization.
You can find the log file on the Service Client machine at the following path:
Windows:
C:\Program Files (x86)\Printer Properties Pro\Printer Installer Client\ServiceClientLogs\PrinterLogicServicePrinterApp.log
Mac/Linux:
/opt/printerinstallerclient/log/printerlogicserviceprinterapp.log
If the installation fails with an InvalidSolutionsKeyError, update the printer's region in the firmware settings.
-
Week Ending In Jan 4th, 2025
-
Released: Dec 27th, 2024
-
Released: Dec 23rd, 2024
-
Android/iOS: Dec 23rd, 2024
-
Released: Dec 9th, 2024
The Control Panel Application (CPA) displays text in the following languages. For more information see Vasion Print (formerly PrinterLogic) Supported Languages.
- Dutch - 0413
- English - 0409
- French - 040C
- German - 0407
- Italian - 0410
- Japanese - 0411
- Polish - 0415
- Portuguese - 0416
- Simplified Chinese - 0404
- Spanish - 040A
- Swedish - 0409
- Thai - 041E
- Turkish - 041F
To display a printer in the CPA Manager list, it only needs to be associated with a Service Client. A Service Client can also be assigned to a printer through the printer’s Apps tab. If it is assigned in the printer's Apps tab, it also displays in the CPA Manager.
However, keep in mind that just because a printer is displayed in the CPA Manager does not necessarily mean it is configured correctly. If the configuration on the printer Apps tab is incorrect, such as an incorrect username and password, the installation will fail whether it is initiated from the printer's Apps tab or the CPA Manager.