Last updated: April 26, 2024
Advanced Groups
Advanced Groups let you combine two or more objects into one, like a deployment to users in a group but only to those members in a specific IP address range. End-users who meet the requirements of the two deployments automatically have the printer installed on their workstation.
An Advanced Group "entity" is called a rule because it combines two or more deployment types, and the end-user must meet the requirements of the rule for installation to occur. Advanced groups can be used to add or to exclude. For example, you can add the IP address range 192.168.3.0 to 192.168.3.100 but exclude the Sales group. The advanced group deployment would install a printer on any workstations within the IP range unless the end-user is part of the Sales team.
Overview
Here are some key points you should know about Advanced Groups:
- Rule operations: The operation determines whether the value is included or excluded from the printer deployment.
- Contained In: An object that determines where a printer is deployed.
- Excluding: An object that is excluded from a printer deployment.
- Terminal Service Session option: Identifies end-users who are working from a virtual desktop. If a rule contains the Terminal Services Session option it only applies to end-users working from virtual machines.
Supported Rule Types
- Active Directory User, Computer, or Group
- Active Directory Container or OU
- Terminal Services Session
- IP Address Range
- Hostname
- MAC Address
An active LDAP connection is not necessary to have configured unless you wish to have specific users or groups as part of the rule. Without the connection, the client is limited and will only see the user and group information the operating system provides. See LDAP Domain for configuration steps.
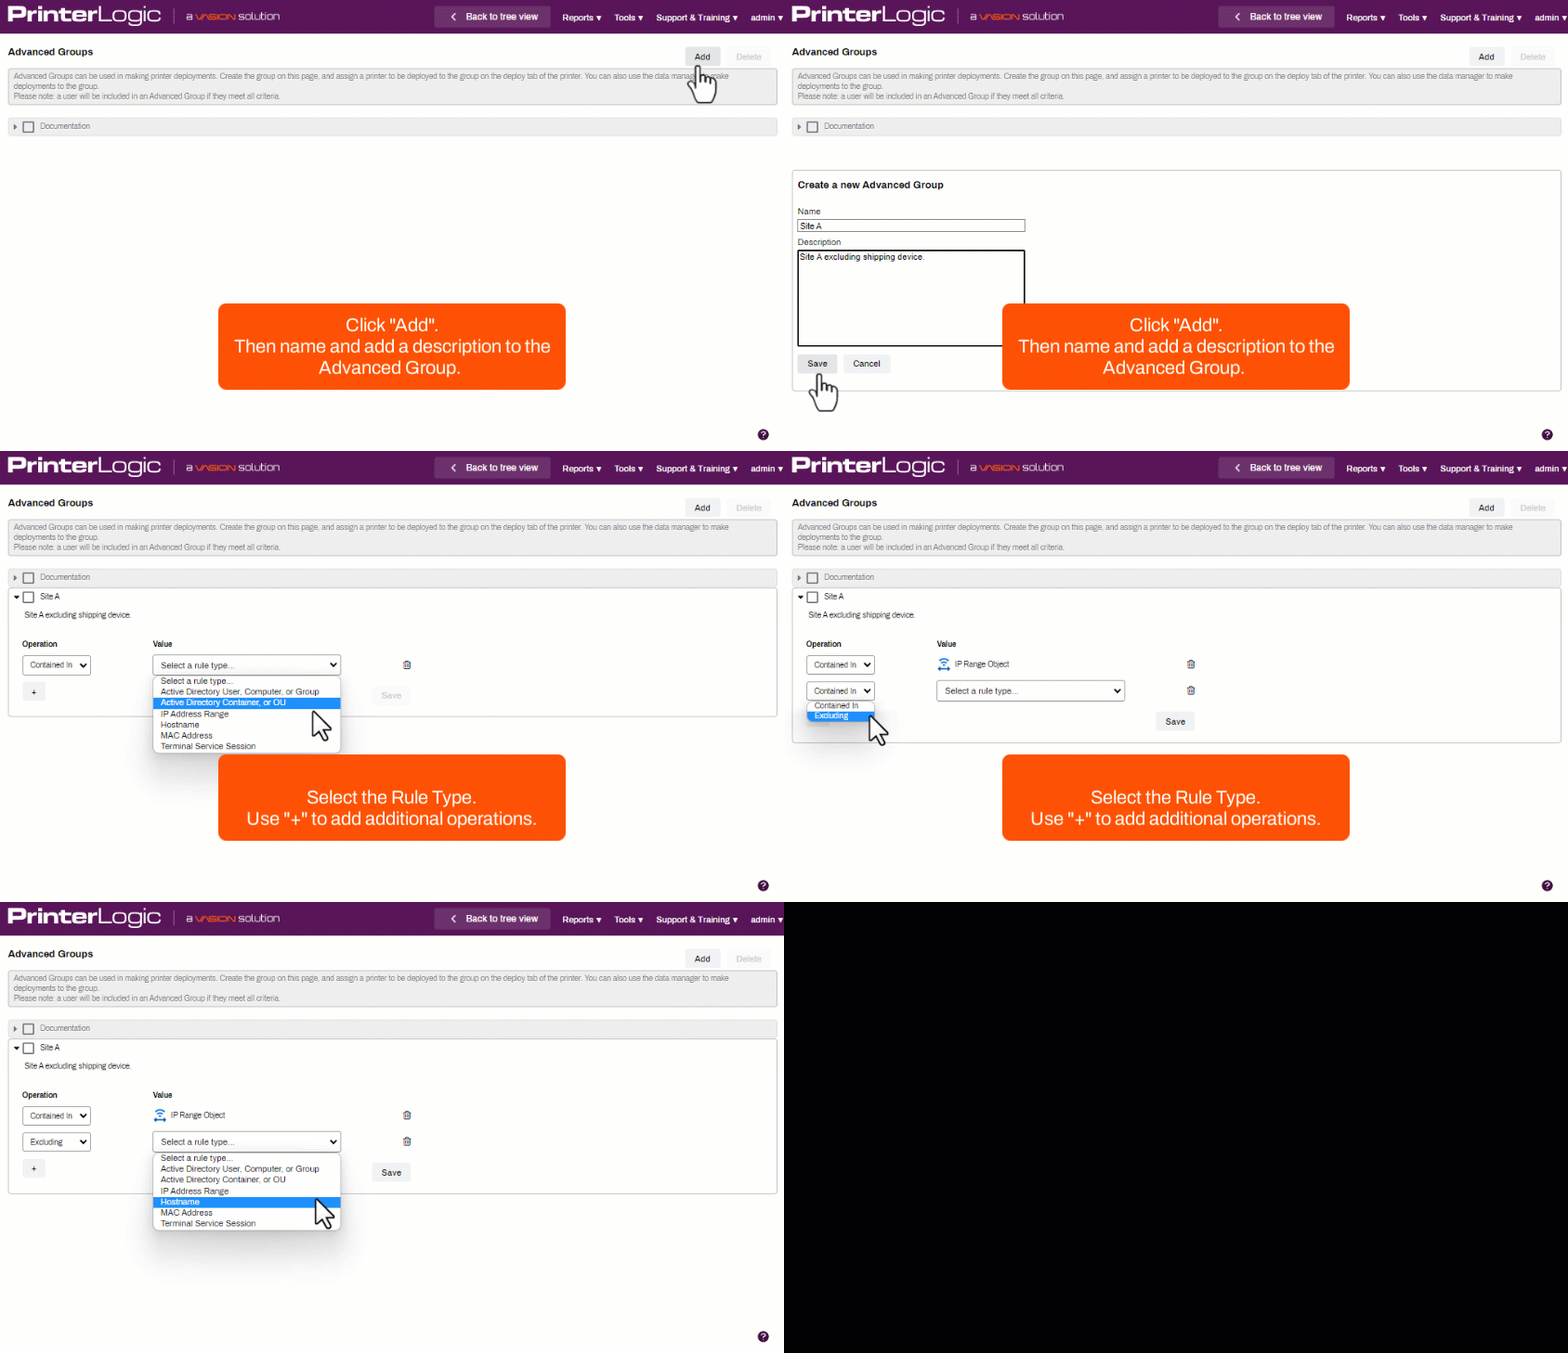
Create Advanced Group
- In the Admin Console, navigate to Tools
 Advanced Groups.
 - Click Add in the upper right.
- Enter the name and description (optional)
- Click Save.
- Operation drop-down, choose Contained In or Excluding.
- Value drop-down, select the Rule Type.
- Follow the steps to find your object, click Add.
- Once all Rule Types are added, click Save.

Now that the advanced group has been added, it is available to use in printer deployments. See Printer Deployment for steps to apply advanced groups..
-
Release Date: 17 May, 2024
-
Windows Client Release Notes Updated
Release Date: 16 May, 2024
-
Mac/Linux Client Release Notes Updated
Release Date: 16 May, 2024
-
Chrome OS Client Release Notes Updated
Release Date: 24 April, 2024
-
Topic on additional options.
-
A new topic has been added for HP devices using ONCP
-
A setting has been added to only print attachments.