Last updated: February 09, 2024
Printing
To use the app you need to have printers installed. See Printers for installation instructions.
Basic Printing
You can print immediately using the device's native functions to the printers you have installed. To use secure printing functions use the PrinterLogic App print functionality.
iOS Devices
- On the document or screen to be printed, select the print option.
The print option can vary based on the application you are printing from. In some cases it may be found by selecting the 3-dots followed by selecting Share & Export then Send a Copy. It may also be found by selecting the Share Icon

- If prompted, select the format to print as.
- Select the PrinterLogic option.
- In the Printer field, select the printer you want to print to.
- Select other options such as copies, color, pages, etc. as desired.
- Click on Print.
- Select the action to be performed:
- Print - Will immediately print the item to the specified printer.
- Hold - Will hold the document in the queue until a release action is taken at the printer.
- Cancel - Will discard the print job.
Printing from the iOS Mail App
- Open the email to be printed.
- Select the
 Icon.
Icon. - Select Print.
- Touch and hold the image until it adjusts to a smaller size.
- Quickly tap on the image.
- If prompted, select the format to print as.
- Select the PrinterLogic option.
- In the Printer field, select the printer you want to print to.
- Select other options such as copies, color, pages, etc. as desired.
- Click on Print.
- Select the action to be performed:
- Print - Will immediately print the item to the specified printer.
- Hold - Will hold the document in the queue until a release action is taken at the printer.
- Cancel - Will discard the print job.
Android Devices
The options available when printing with an Android device will depend on the type of printer you choose to print to. These options are to immediately release the print job, or to have the print job held until you are standing at the printer to release with the mobile app. The only way to have a job held to be released at the printer is if you use a printer designated as a Pull Printer by your IT admin. Otherwise, using any other type of printer will cause the job to be immediately released.
When printing with an Android device, depending on the app being used, the process and options may vary. For some apps there may be an option to select of Print or an associated icon of ![]() , and others the option may be Share or an associated icon of
, and others the option may be Share or an associated icon of ![]() . Additionally, at times, to find these options, the 3 dots
. Additionally, at times, to find these options, the 3 dots ![]() may need to be selected first.
may need to be selected first.
Basic Printing
- On the document or screen to be printed, select the appropriate printing option as described in the note above.
- Select the Print option.
- In the Printer field, select the printer you want to print to.
- Select other options such as copies, color, pages, etc. as desired.
- Click on the Print Icon
 to release the job.
Generally this will release the print job immediately. If your IT Admin has made a Pull Printer available to you that has been automatically deployed or you have self-installed, and you print to it, your job will automatically be held until you release it using the mobile app or another release mechanism such as a Control Panel Application.
Releasing / Deleting Held Jobs
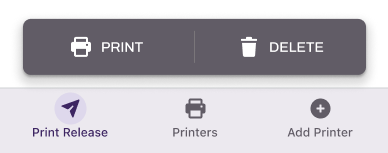
Once logged in to the release app, the default screen that opens is the Print Release screen. On this screen it will display all held print jobs that have been sent by you. By selecting the print job you would like to release, you are presented with two options, Print or Delete .
Selecting the Trash Can icon will present you with a pop-up asking for confirmation on deleting the job. Confirming the delete will remove the job from the list of held jobs.
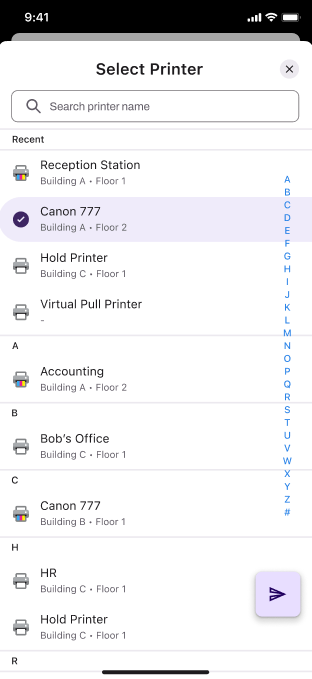
Selecting the Printer icon will present you with a list of available printers that you can select from to release the print job to. Once the printer is selected from the list, selecting the Print icon will release the job to the selected printer.
Using the QR reader
To assist with Touch-less printing, the Print Release App has a built in QR code reader to quickly select the printer to release print jobs to. Additionally, you can also scan a QR code directly from the default camera on the device, which will then prompt you to open the PrinterLogic Mobile App. Doing so will present you with the Release screen where you can select your print job(s) and release it to the printer that was scanned.
These QR codes can be created by Application Administrators and placed on or near the printer. Further information on these codes can be found in the Printing QR Codes document.
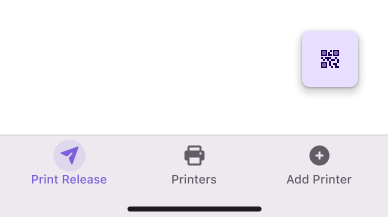
The QR code option can be found on the Print Release screen, then selecting the QR Code icon.
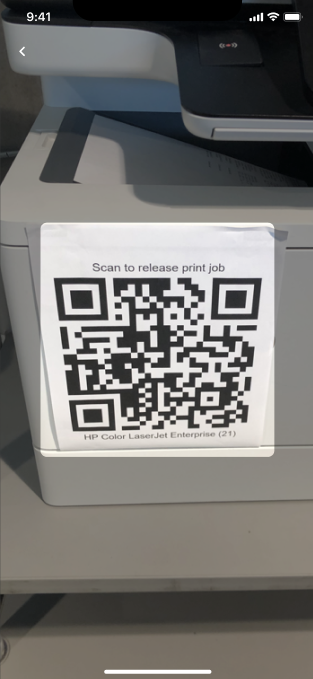
Once the icon is selected, the QR code reader will open and allow scanning a QR code at the printer.
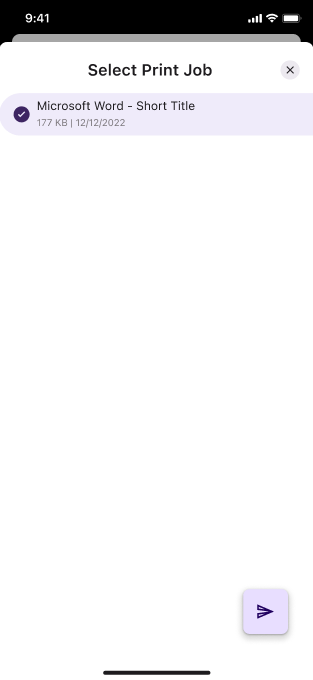
Once the code is scanned, a screen will open to select the print job(s) to release. Clicking on the Release icon will print the job.
Frequently Asked Questions
Most commonly this is because when you printed from your workstation, you selected a specific printer to print to. Depending on how your environment is configured, it is assumed you are performing a secure print function, and are wanting to print to that specific printer. If this is the case, go to the printer printed to and either select the ![]() option, or if configured, scan the QR code by selecting the
option, or if configured, scan the QR code by selecting the ![]() option.
option.
If you are wanting to release to any printer that is an authorized release printer, you will need to print to a Pull Print queue that has been configured by your application administrator. When printing to a Pull Print queue, all available printers will be displayed to select from.
Although held print jobs generally show up on the app very quickly, depending on your network, a print job may take a short period of time to show in the app. Sometimes it is also necessary to refresh your print release screen by using your finger to swipe downward on the screen and letting it go.
Another consideration is how long it has been since you printed the job. As a default, held print jobs are only kept for 12 hours before being purged. This setting can be modified to be shorter or longer by the application administrator. Confirm with them on what this time is set to.
Only printers that are manually added to the mobile device by the user from the Printer tab can be deleted by the user. Printers that have been deployed to the mobile device through the admin console are not able to be deleted by the user from within the app.
Unlike the traditional PrinterLogic client found on end user workstations, the mobile app does not automatically update itself. To see new changes to configurations or deployments, the user must open the app to the Printers page, and pull down on the screen to refresh it.
Yes, the mobile app does feed metadata into the admin console that can be viewed in the various applicable reports.
Yes it does.
No it does not. It is necessary for the user to manually sign themselves out of the app.
-
Release Date: 17 May, 2024
-
Windows Client Release Notes Updated
Release Date: 16 May, 2024
-
Mac/Linux Client Release Notes Updated
Release Date: 16 May, 2024
-
Chrome OS Client Release Notes Updated
Release Date: 24 April, 2024
-
Topic on additional options.
-
A new topic has been added for HP devices using ONCP
-
A setting has been added to only print attachments.
