Last updated: January 29, 2024
Maps
Maps are convenient for people who are new to an environment and allows them to find and install printers with ease.
The Map tab of folder objects is a great tool that simplifies printer installation for the end-user. It allows you to upload a floor plan of your environment and place printer icons relative to where they are in the physical environment. The maps and printer icons display on the Self-service Portal, above the printer lists for those folders.
Hovering over the printer icon displays additional information about the printer they are installing. Even if an end-user does not know the printer name, they can use the visual reference to install the correct one. This greatly reduces help desk calls and questions about which printer to add.
Map Size
Map images are static in size, and PrinterLogic does not auto-adjust the map to the user's computer screen. We recommend 850 x 480 px to work across most monitors, and the maximum file size must be 900 kb or less. Larger files will display an error.
Upload Maps
Once you have a floor plan image ready, click on the folder where you want to apply it and select the Map tab.
- Click either Upload Background Image button.
-
Click Choose File.
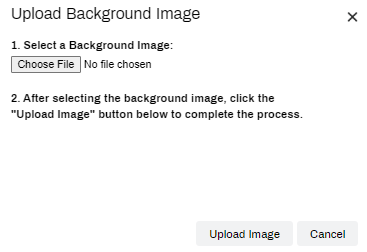
- Navigate to and select the floor plan image.
- Click Upload Image.


When a map has been uploaded, the option in the header will be replaced with the Remove Background Image button, and the map displays on the page.
Add Printers
Printers within the folder display in the gray box to the left of the map.
- Drag and drop the printer icon onto the map in the desired location.
- Click Save after printers have been placed.
- The Cancel button removes the printers placed since the last save.
Adjust printer icons at any time in the Admin Console. If a new printer is added to the folder, it will appear in the gray box to the left of the map.
The Self-service Portal folder map mirrors the one in the Admin Console.

Self-service Portal Maps
Once the map is uploaded and the printers are placed, navigate over to the Self-service Portal.
When the folder is clicked on, the map displays at the top. When end-users hover over the printer icon, additional information about the printer is displayed along with the Install Printer button.
Below the map, printers list out the same as folders without maps. Install printers from either the map or list.

Resize Printer Icons
- In the Admin Console tree view, select a folder that contains the map with the printer icons you want to resize.
- Click the Map tab.
- When the map appears, right-click the printer icon you would like to resize.
- Select the new icon size (small, medium, large).
- Click Save.
Remove Maps
This option appears only if you have uploaded an image to the Map tab. Click Remove Background Image in the upper right to delete it.

-
Release Date: 17 May, 2024
-
Windows Client Release Notes Updated
Release Date: 16 May, 2024
-
Mac/Linux Client Release Notes Updated
Release Date: 16 May, 2024
-
Chrome OS Client Release Notes Updated
Release Date: 24 April, 2024
-
Topic on additional options.
-
A new topic has been added for HP devices using ONCP
-
A setting has been added to only print attachments.