Last updated: May 06, 2024
Firefox Extension
The PrinterLogic Firefox Extension is used to ensure proper communication takes place between the Firefox Browser and your PrinterLogic instance. This extension allows the installed client to communicate with and access the features within the Self-service Portal when using the Firefox Browser.
The Firefox extension is necessary to have in place for anyone in an organization logging into the Self-service Portal, and for some features within the Admin Console.
Installing the Extension
- Open your Firefox browser.
- Navigate to your PrinterLogic Self-service Portal.
-
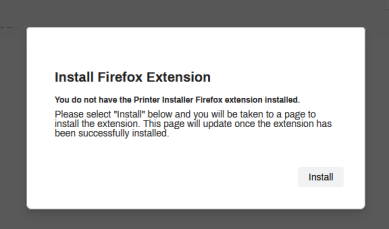
Click on Install to begin the PrinterLogic Firefox Extension installation.
-
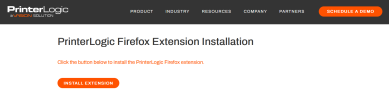
Click on Install Extension to begin.
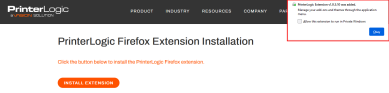
- Follow the on-screen prompts to add the extension.
-
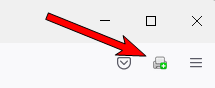
Once complete, you will be notified that it was added and the extension will display in the browser extension section.
-
When the installation completes, the extension will be displayed in the extension area.
The Firefox Browser Extension is only used to ensure full functionality while using the Firefox browser. There are no available options by clicking on the extension. PrinterLogic features are only available through the client in the System Tray or the Start menu.
-
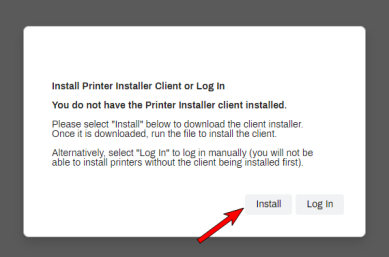
If the PrinterLogic Client is not already installed, when you navigate back to the Self-service Portal, you will be prompted to Install the PrinterLogic Client. Click Install to begin.
-
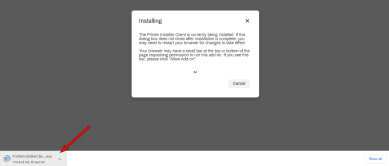
The client download process will begin.
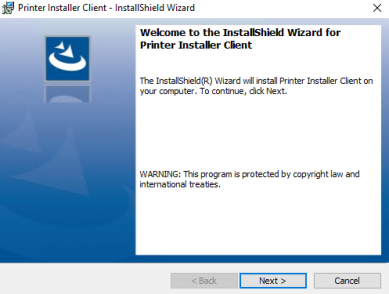
- Once the file is downloaded, run the file as an administrator to install the client.
-
Follow the prompts displayed in the installation wizard.
After the installation completes, it may be necessary to refresh your browser to open PrinterLogic.
-
If this is an installation on a new machine, the PrinterLogic Client Icon will also now be displayed in the system tray.

If this is a new machine installation, you may be prompted to provide an authorization code (Device Authorization) depending on how the machine was configured by the administrator.
-
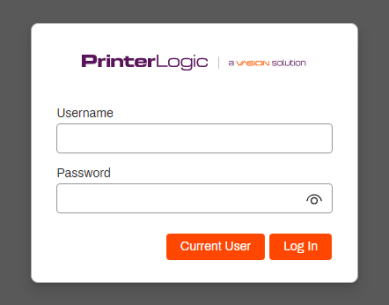
Browse to your Self-service Portal, and sign in using the correct Identity Provider credentials set by your admin.
-
At this point, you will now be able to self install printers.


-
Release Date: 17 May, 2024
-
Windows Client Release Notes Updated
Release Date: 16 May, 2024
-
Mac/Linux Client Release Notes Updated
Release Date: 16 May, 2024
-
Chrome OS Client Release Notes Updated
Release Date: 24 April, 2024
-
Topic on additional options.
-
A new topic has been added for HP devices using ONCP
-
A setting has been added to only print attachments.