Last updated: May 23, 2024
Konica Minolta - CPA 1.0
Follow these steps to install the first-generation Control Panel Application (CPA) on Konica Minolta printers.
Installation Requirements
Ensure all of the universal requirements are completed and functional prior to CPA setup. In addition, Konica Minolta has the following additional requirements.
Maintenance / System Settings
The menu on your device may vary depending on Multifunction Printer (MFP) Model.
- Create and install an SSL certificate.
- Go to the SSL settings and set to Use SSL at all times for Admin Mode and User Mode.
- (Optional) Set the Certificate Verification Settings to Off so that the certificates do not need to be consistently authorized.
- In the Network Tab perform the following steps:
- Set TCP Sockets to Use SSL / TLS.
- In the OpenAPI settings section, set Use SSL/TLS to SSL Only.
- Set WebDav Server to be SSL Only.
- Power cycle the MFP.
Occasionally, in spite of creating a certificate, the SSL options as shown above still appear grayed-out because there may be an issue with the certificate. The workaround is to create a new certificate, which should enable the fields.
Additional Port Information
Konica Minolta MFPs use port 443 to receive files via WebDAV, which is used when the Virtual Appliance registration tool sends the initial page. A separate port is used to receive OpenAPI messages from the application. By default this port is 50003.
Installation Steps
If the Version field does not appear in the interface, the manufacturer does not support CPA 1.0. You will need to follow the appropriate CPA 2.0 topic.
These are the steps to install the CPA on a single printer using the printer object's Apps tab. Reference CPA Manager to install the CPA on multiple printers at once.
- In the Admin Console tree structure, select a printer.
- Select the Apps tab.
- In the Manufacturer field, select the desired manufacturer.
- In the Version field, select CPA 1.0.
- Select Save
- Select Install Application on Printer.
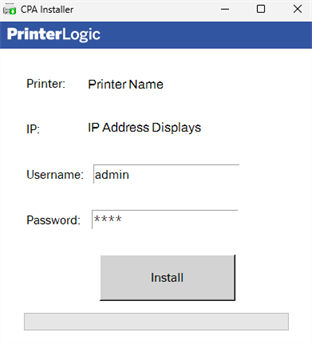
- The CPA Installer downloads and generates a modal requesting the credentials for the printer web interface.
- Enter the credentials and select Install.
CPA 1.0 does not require a Service Client to install the CPA. The Service Client drop-down on the Apps tab is only used when installing Copy/Scan Tracking on a printer.
Date / Time Settings
On most Konica Minolta MFPs, you can configure the start and end dates for DST. Certain MFP models come with predefined DST dates already programmed.
Having the correct date, time, and time zone settings on your Konica Minolta Multifunction Printer (MFP), including Daylight Savings Time (DST) information, is crucial to ensure accurate reporting.
On specific models, time stamps in Virtual Appliance reports may display an incorrect hour during the transition periods at the start and end of Daylight Saving Time (DST). To address this issue you can adjust the MFP's time zone by one hour during those particular weeks to maintain accurate time stamps during DST transitions.
Copy/Scan Tracking
Copy/Scan Tracking uses SNMP to track and report the number of copies and scans on a supported multi-function printer. The Print Job Records report provides details on the number of scans and copies on the selected printer for auditing and reporting purposes.
The Service Client drop-down field and Install Copy/Scan Tracking on printer setting on the printer object's Apps tab are separate from the CPA v1 installation. Reference the Copy/Scan Tracking topic for prerequisites and steps.
![]()
Uninstall the CPA
- Navigate to the printer's Apps tab.
- Select the Uninstall Application from Printer button.
-
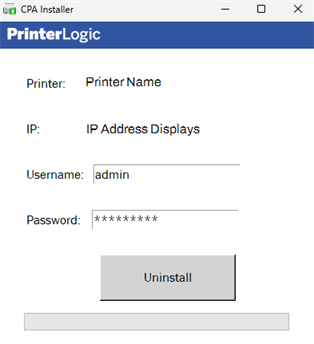
The CPA Installer / Uninstaller downloads and generates a modal requesting the credentials for the printer web interface.
- Enter the credentials and select Uninstall.
The CPA is uninstalled when the process completes.
-
New Mobile App Release
iOS: November 11th, 2024 -
Released: November 11th, 2024
-
Released: October 22nd, 2024
Updated Application Version Included