Last updated: November 14, 2024
HP - CPA 1.0
Follow these steps to install the first-generation Control Panel Application (CPA) on HP printers.
Installation Requirements
Ensure all of the universal requirements are completed and functional prior to CPA setup. In addition, HP has an optional setup step.
- (Optional) Self-signed Certificate. Follow the steps below if you want to use a self-signed certificate.
HP Self-Signed Certificate
Generate the Certification Authority
- Create a directory (IISCertificate) under your home folder.
-
Create a 2048-bit key to be used when creating your CA.
Copy Codeopenssl genrsa -des3 -out ca.key 2048
-
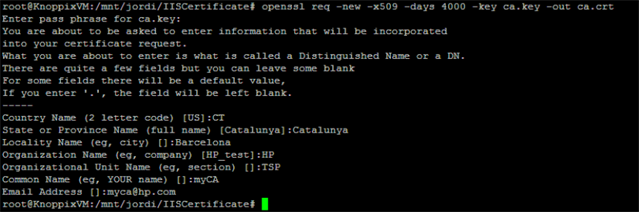
Create the CA certificate request.
Copy Codeopenssl req -new -x509 -days 4000 -key ca.key -out ca.cer
-
When you are asked to enter a pass phrase, make sure you enter the pass phrase used in step 2. The output CA certificate will be generated in “ca.cer”.
-

You will be asked to supply a pass phrase for ca.key. The pass phrase will be requested whenever you use the CA certificate so make sure you remember it. This will create a file called “ca.key” that contains your certificate authority private key.
Upload the Certificate
- Log in to the Admin Console.
- Navigate to Tools
 Settings General.
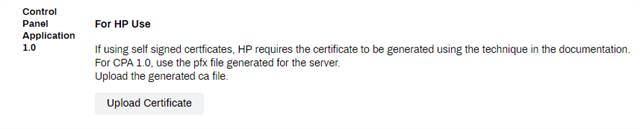
 - In the CPA 1.0 section, select Upload Certificate.
- Select Choose File.
- Navigate to the CA file, select it and select Open.
- Select Upload.
- Select Save
The certificate is updated automatically on deployed printers, and is sent automatically with newly installed printers.
Generate a Server Certificate
-
Create a 2048-bit key to be used when creating the server certificate.
Copy Codeopenssl genrsa -des3 -out server.key 2048
You will be asked to supply a pass phrase. The pass phrase will be requested whenever you use this certificate so make sure you remember it. This will create a file called “server.key,” containing your server private key.
-
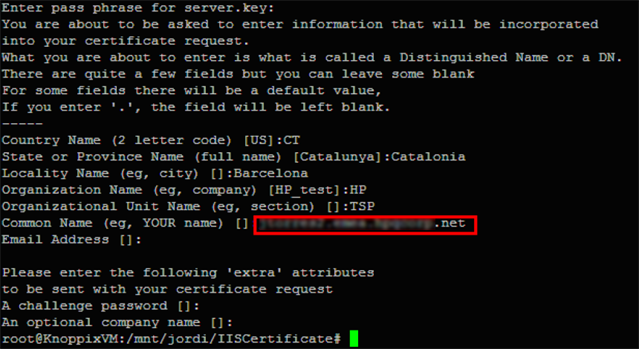
Create the server certificate request.
Copy Codeopenssl req -extensions ssl_server -new -key server.key -extensions usr_cert -out server.csr
- When you are asked to enter a pass phrase for “server.key,” make sure you enter the pass phrase used in step 1, which creates the server certificate request “server.csr.”
- The “Common Name” has to match the Fully Qualified Domain Name (FQDN) of the Web server.” A quick way to get this info is by executing the following command: “
nslookup <WebServer_IP_address>.”
-
Sign the certificate signing request (csr) with the self-created certificate authority (CA) that you made earlier by running the following command:
Copy Codeopenssl x509 -req -startdate -days 365 -in server.csr -CA ca.cer -CAkey ca.key -extensions usr_cert -out server.crt -CAcreateserialBy using the “-startdate” parameter, you are signing the certificate against the current date/time. Make sure that your environment has the correct date/time and time zone setup. If an error comes back for
fopen:No such file or directory:bss_file.c:398:fopen('ca.srl', 'r'), then add-CAcreateserialto the command.- When you are asked to enter a pass phrase for “ca.key,” make sure you enter the pass phrase used in step 1. This will create the server certificate “server.crt.”
-
Generate a .PFX file / PKCS#12 certificate
Copy Codeopenssl pkcs12 -export -in server.crt -inkey server.key -certfile ca.cer -name <FQDN> -out serverCert.pfxEnsure you replace
<FQDN>with your Virtual Appliance FQDN, used in step 2.- When you are asked to enter a pass phrase for “server.key,” make sure you enter the pass phrase used in step 1. This will create the “serverCert.pfx” file. You will then be asked to supply an export password that to use when uploading the certificate in the printer's web portal.
-
Upload the PFX file into the printer's web portal.
The printer's web portal is accessed by browsing to the printer's IP address.
- In the printer's web portal, navigate to the Security tab.
- Select Certificate Management.
- In the Install Identity Certificate section, select Import Identity Certificate with Private Key.
- Upload the serverCert.pfx file using the export password you created.
- Select Install.
- Once the upload is complete, you will be able to scroll down and see the FQDN listed under the Issued To field.

Installation Steps
If the Version field does not appear in the interface, the manufacturer does not support CPA 1.0. You will need to follow the appropriate CPA 2.0 topic.
These are the steps to install the CPA on a single printer using the printer object's Apps tab. Reference CPA Manager to install the CPA on multiple printers at once.
- In the Admin Console tree structure, select a printer.
- Select the Apps tab.
- In the Manufacturer field, select the desired manufacturer.
- In the Version field, select CPA 1.0.
- Select Save
- Select Install Application on Printer.
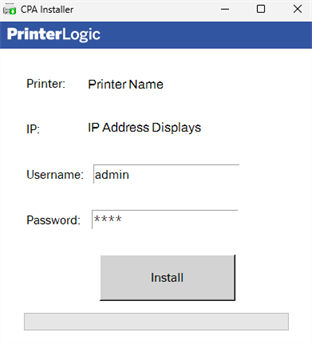
- The CPA Installer downloads and generates a modal requesting the credentials for the printer web interface.
- Enter the credentials and select Install.
Copy/Scan Tracking
Copy/Scan Tracking uses SNMP to track and report the number of copies and scans on a supported multi-function printer. The Print Job Records report provides details on the number of scans and copies on the selected printer for auditing and reporting purposes.
The Service Client drop-down field and Install Copy/Scan Tracking on printer setting on the printer object's Apps tab are separate from the CPA v1 installation. Reference the Copy/Scan Tracking topic for prerequisites and steps.
![]()
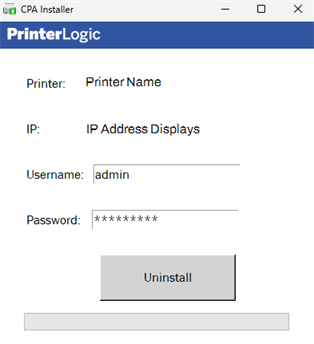
Uninstall the CPA
- Navigate to the printer's Apps tab.
- Select the Uninstall Application from Printer button.
-
The CPA Installer / Uninstaller downloads and generates a modal requesting the credentials for the printer web interface.
- Enter the credentials and select Uninstall.
The CPA is uninstalled when the process completes.
-
New Mobile App Release
iOS: November 11th, 2024 -
Released: November 11th, 2024
-
Released: October 22nd, 2024
Updated Application Version Included