Last updated: June 28, 2024
Direct Email Printing
Direct Email Printing allows end-users, validated through Active Directory, to send or forward an email to a printer where it is released.
Direct Email Printing forwards an email to a specific email address, and Active Directory determines if the end-user's email address is authorized to release to the printer. The print job is immediately released to the printer if Active Directory approves the end-user's email address.
Unlike Email Printing, Direct Email Printing jobs are automatically sent to the printer and cannot be held for later release.
Direct Email Guest Printing is also an option. More information can be found on it in the Direct Email Guest Printing topic.
Email Printing is only supported for those using LDAP/Active Directory. The use of IdPs such as Azure, Okta with Email Printing is currently not supported.
Printers using a Canon Generic Plus PCL6 driver must have the Spooling at Host setting disabled. Having this setting enabled causes email print jobs to remain in a held status, and they will not print.
The prerequisites and configuration steps below walk you through setting up Direct Email Printing.
Prerequisites
-
Create an Email Account.
- IMAP must be enabled for the mailbox, unless you are using Office 365 / Exchange which requires OAuth.
- Make note of the mailbox username, password, IMAP/OAuth/SMTP connection information.
- Set a subdomain as the internal relay.
Reference the following Knowledge Base articles for additional information on Office 365/Exchange and Gmail.
-
Configure the LDAP Domain.
- Each user's email address must be stored as an attribute in the Active Directory user object.
If only Direct Email Guest Printing is being configured, an LDAP configuration is not required. The LDAP Domain is required for Direct Email Printing.
- Create / Assign a Service Client object to run the Email Printing service.
- LibreOffice must be installed on the device designated as the Service Client.
- Create a Pull Printer. Reference the Create a Pull Printer section of the Pull Printing topic.
Aliases might not work properly with Office 365 / Exchange. Reference What do I do if the alias is being stripped from the To: field in the Troubleshooting section for a workaround.
Configure Email Printing
- In the Admin Console, navigate to the Service Client's Email Printing tab.
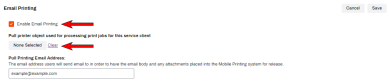
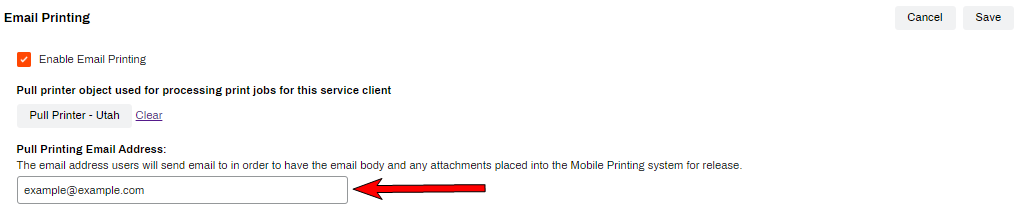
- Check the box for Enable Email Printing.
-
Select the None Selected button and select the Pull Printer to use for processing email print jobs.
-
Enter the email address that you would like to use for Email Printing.

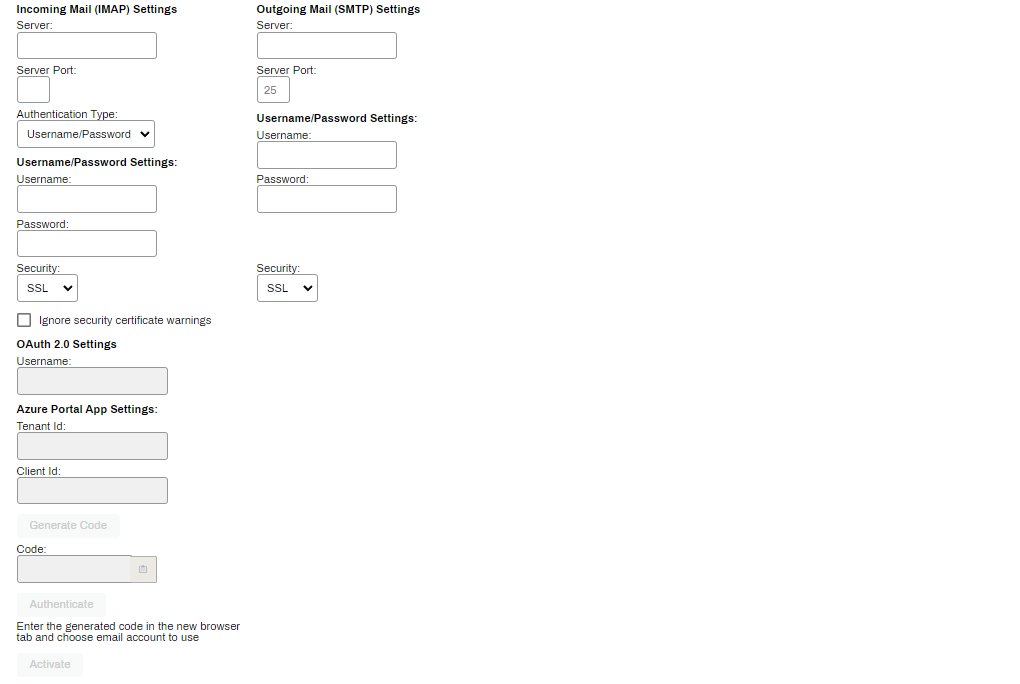
- Configure the IMAP settings.
- If using Office 365 or Exchange online, and need to configure OAuth 2.0, see the Configure OAuth 2.0 documentation.
-
Configure the SMTP settings.

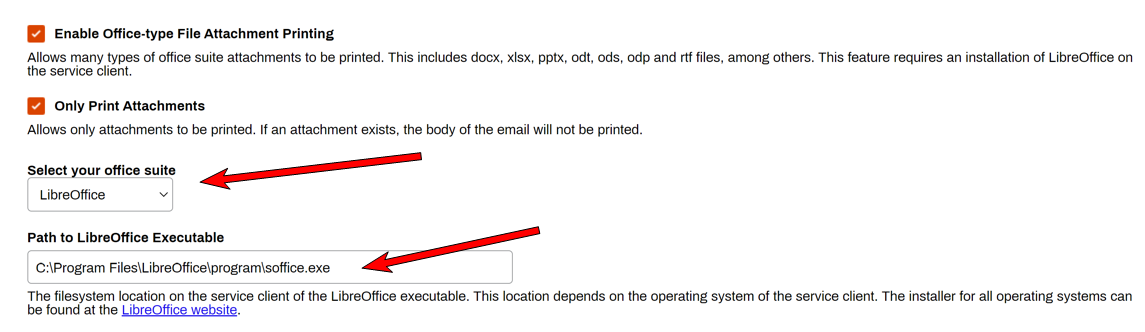
- Select Enable Office-type File Attachment Printing if you want to enable end-users to print attachments.
-
Type the path to access the LibreOffice executable.

-
Check the box for Direct Email Printing:
-
Enable Direct Email Printing.
If wanting to use Direct Email Guest Printing, see the topic specific to it for further information.

-
- If you are using PKI Encryption, reference PKI Encryption for steps.
- Select Save.
-
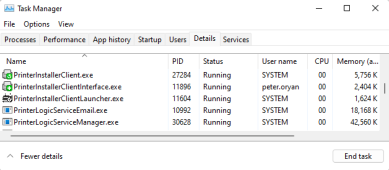
On the Service Client, verify the PrinterLogicServiceEmail.exe is running.
- Open Task Manager and select the Processes or Details tab.
- The three client processes, PrinterLogicServiceManager.exe, and PrinterLogicServiceEmail.exe should all be running.
- Services for other features enabled on the Service Client will also be running.


Enable Email Pull Printing
- In the Admin Console, navigate to the Email Pull Printing section on Tools
 Settings Printing.
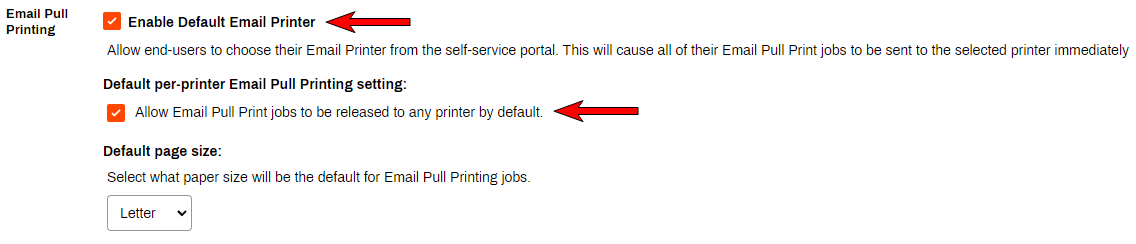
 - Check the box for Enable Default Email Printer.
-
Check the box for Allow Email Pull Print jobs to be released to all printers by default.

- Optional: Select the Default Page Size.
- Click Save.
- Navigate to the printer object's Printing tab that you want to use to release mobile print jobs.
- Must be a TCP/IP printer object, and not a pull printer.
-
In the Email Pull Printing section, click the Use default Email Pull Print setting.

- Click Save.

- Navigate to the printer object's Printing tab that you want to use to release mobile print jobs.
- Must be a TCP/IP printer object, and not a pull printer.
- In the Email Pull Printing section, click Use printer-specific Email Pull Print setting.
-
Check the box for Allow Mobile Print jobs to be released from this printer.

- Click Save.

Configure Direct Email Printing
The process for enabling Direct Email Printing is included in the steps below.
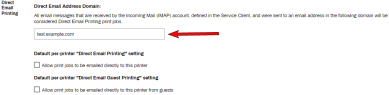
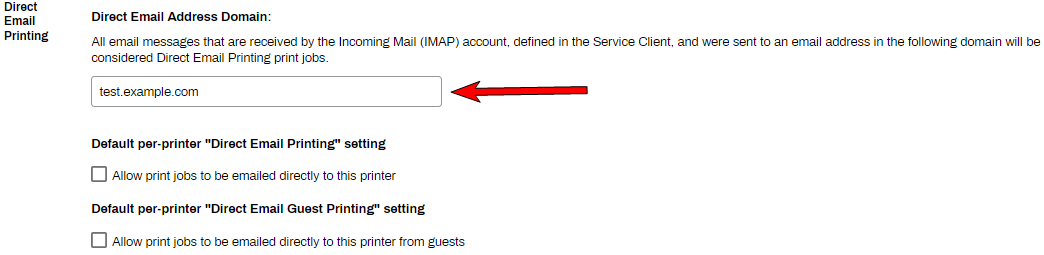
- In the Admin Console, navigate to the Direct Email Printing section on Tools Settings Printing.
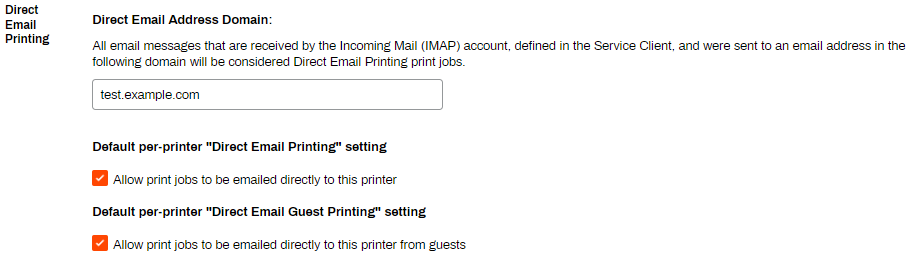
- In the Direct Email Address Domain, enter in the email address domain end-users will use.
- The domain is auto-populated to the Direct Email Address field in the Direct Email Printing section of the printer object's Printing tab.
-
Check the box for Allow print jobs to be emailed directly to this printer.
If wanting to use Direct Email Guest Printing, see the topic specific to it for further information.

- Click Save.
- Navigate to the printer object's Printing tab that you want to use to release mobile print jobs.
- Must be a TCP/IP printer object, and not a pull printer.
- Scroll to the Direct Email Printing section.
-
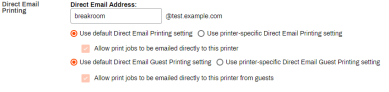
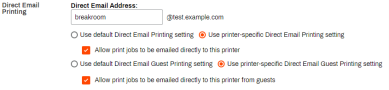
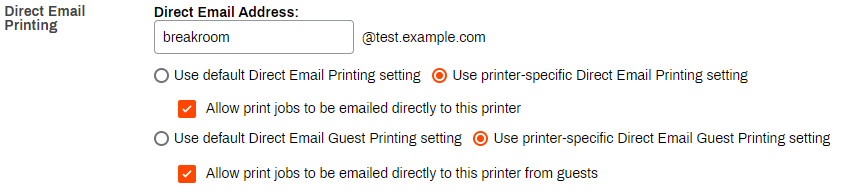
In the Direct Email Address: field, type the email address prefix the end-users will enter to send the email to the print queue.
Gmail handles aliases using +. If the pull printer email address assigned on the Email Printing tab is printercloud@gmail.com, and the printer's object's name is reception, the Direct Email Address field would be printercloud+reception@gmail.com. See Direct Email Printing using Gmail for more information.
- Select Use default Direct Email Printing settings.
- Click Save.

- In the Admin Console, navigate to the Direct Email Printing section on Tools Settings Printing.
-
In the Direct Email Address Domain, enter in the email address domain end-users will use.
- The domain is auto-populated to the Direct Email Address field in the Mobile Printing:Direct Email Printing section of the printer object's Printing tab.
- For the printer-specific option, leave the two Default per-printer boxes unchecked.
- Click Save.
- Navigate to the printer object's Printing tab that you want to use to release mobile print jobs.
- Must be a TCP/IP printer object, and not a pull printer.
- Scroll to the Direct Email Printing section.
-
In the Direct Email Address: field, type the email address prefix the end-users will enter to send the email to the print queue.
Gmail handles aliases using +. If the pull printer email address assigned on the Email Printing tab is printercloud@gmail.com, and the printer's object's name is reception, the Direct Email Address field would be printercloud+reception@gmail.com. See Direct Email Printing using Gmail for more information.
- For Direct Email Printing, select the bubble for Use printer-specific Direct Email Printing setting.
Check the box for Allow print jobs to be emailed directly to this printer.
If wanting to use Direct Email Guest Printing, see the topic specific to it for further information.
- Click Save.
Print jobs send to the Direct Email Address of the printer object will now print out at that device.
Troubleshooting
If you are seeing alias is automatically stripped from the To: field, follow the steps below as a workaround:
- Remove the alias from the original account.
- Create a distribution list called <printername>@<companyname>.com with only this email address listed.
The only member of the list is the <print@<companyname>.com account, so mail should be delivered to the print@printerlogic.com mailbox with <printername>@<companyname>.com in the To: field.
The following requirements are necessary for setting up a mailbox for Email Printing.
- The new email account cannot be a shared mailbox.
- IMAP must be enabled for the mailbox unless you are using Office 365/Exchange, in which case OAuth must be used.
- To configure Email to Print, you will need to know the mailbox username, password, and IMAP/SMTP connection information. (POP3 is currently not supported)
- If using Direct Email Printing, email routing rules on the mail server must be configured to route mail sent to the direct email addresses of the printers to this mailbox.
The formats supported for email attachments depends on whether or not you have LibreOffice installed on your server.
LibreOffice is not required per se, but if you do not install it, the file formats allowed will be significantly limited.
Without LibreOffice Installed:
.pdf, .txt, .html, .htm, .jpg, .gif, .png, .bmp
With LibreOffice Installed:
Document: .pdf, .doc, .dot, .docx, .dotx, .odt
Spreadsheet: .xls, sxlsx, .xlt, .xltx, .xlsm, .ods
Presentation: .ppt, .pptx, .pot, .potx, .odp
Text: .txt, .rtf
HTML: .html, .htm
Images: .jpg, .jpeg, .gif, .png, .tiff, .tif, .bmp
-
Released: September 3rd, 2024
-
Updated Supported ChromeOS Version
Supports ChromeOS 109+
-
New Mobile App Releases
Released: August 26th, 2024 -
New Host and Application Builds
Released: 8/20/2024
Updated Client Versions Included
-
Set Up Using VMM
Now Supporting Linux KVM Environments