We've Moved!
We've unified our Vasion Print (formerly PrinterLogic) and Vasion Automate documentation into a single, streamlined resource to better serve you. Visit our new unified documentation site: docs.vasion.com
Note: This legacy site will not be updated after January 6, 2025, and will remain available for reference until May, after which all traffic will automatically redirect to docs.vasion.com/a/Get_Started/Automate.htm.

Last updated: January 07, 2025
Output Automation Console
The Output Automation Console provides admins with a central location to monitor Output Automation activity and can see near real-time print job traffic through Output services within the Console, as well as the status of the physical printers themselves, providing critical insights when troubleshooting issues.
With the Output Automation Console, admins can:
- Monitor the Output Automation environment.
- View printers.
- View the status of current and processed jobs.
- Recover from printing issues.
- Reprint past jobs.
- Redirect printing to a back up printer.
- Pause print queues.
Access the Output Automation Console
The Output Automation Console is only available to Vasion Print (formerly PrinterLogic) customers with Output Automation enabled and have migrated to the unified login experience, as it requires additional functions only available with Vasion Automate. For more details, seeUnified Login Experience.
Learn more about Output Automation. Reach out to your Vasion representative for details and licensing.

Console Details
Print Jobs
The Print Jobs tab displays information about jobs processed by Output Automation. In the left-side tree structure, you can filter print jobs by selecting specific folder(s) or printer object(s). Not selecting a folder or object in the tree structure displays all print jobs.
- Print Job Name — the name of the file sent through Output Automation.
- If you've disabled the Include print job title in reports setting on Tools
 Settings Printing in the Admin Console, this field displays Omitted instead.
- If you've disabled the Include print job title in reports setting on Tools
- Status — the current status of the job. Display options are Completed, Printing, In Progress, Waiting, and Failed.
- Pages — page count of the sent job.
- Size — size of the file sent in bytes / megabytes.
- Printer — the destination printer for the print job.
- Submitted — date and timestamp the file was sent.
- User — the user who sent the print job.
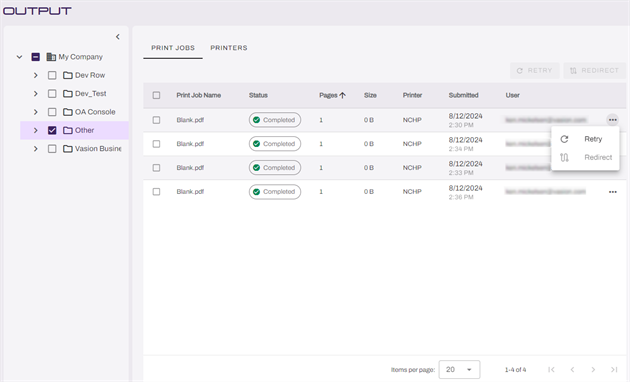
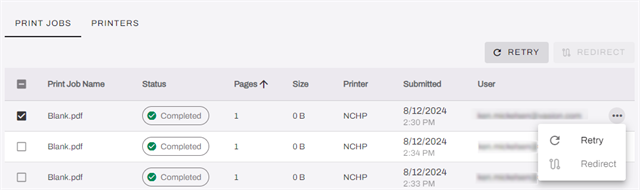
Print Job Actions
Retry
You can only retry print jobs with a Failed or Completed status.
To retry the print job:
- Select the box next to the print job name.
- Select the Retry button in the upper-right.
OR
- Select the three dots to the far-right of the print job.
- Select Retry.
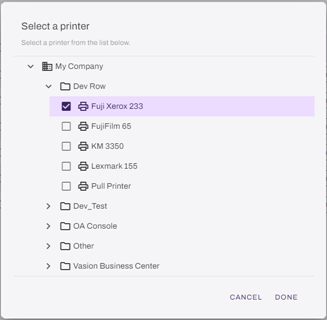
Redirect
You can only redirect print jobs with a Failed status.
To redirect the print job:
- Select the box next to the print job name.
- Select the Redirect button in the upper-right.
- In the Select a printer modal, browse to and select the desired printer.
- Select Done.
OR
- Select the three dots to the far-right of the print job.
- Select Redirect.
- In the Select a printer modal, browse to and select the desired printer.
- Select Done.
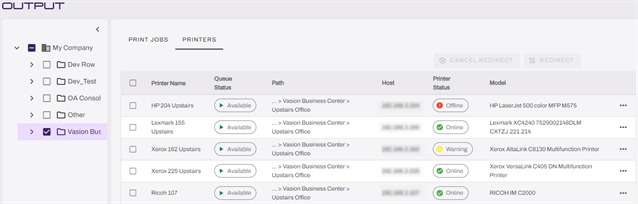
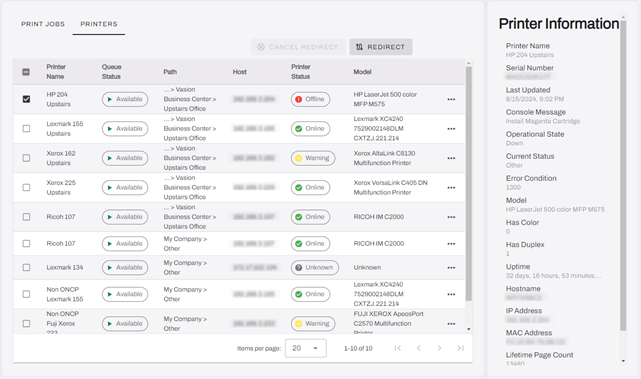
Printers
The Printers tab lets you quickly view and manage printers in your environment. In the left-side tree structure, you can filter printers by selecting specific folder(s) or printer object(s). Not selecting a folder or object in the tree structure displays all printers.
- Printer Name — The name of the printer as it appears in the Admin Console.
- Queue Status — The current queue status of the printer. Display options are Available, Paused, and Redirected.
- Path — Path to the printer in the tree structure.
- Host — IP Address or Hostname of the printer.
- Printer Status — The current status of the printer. Display options are Online, Warning, Offline, and Unknown.
- Model — Device model information reported via SNMP.
Printer Information
Select a printer from the list to view additional SNMP information and error messages. If you've selected more than one printer, the Printer Information modal will not display.
The modal shows:
- Printer Name
- Serial Number
- Last Updated
- Console Message
- Operational State
- Current Status
- Error Condition
- Model
- Has Color
- Has Duplex
- Uptime
- Hostname
- IP Address
- MAC Address
- Lifetime Page Count
- SNMP Protocol Version
Printer Actions
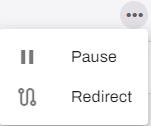
Pause
To pause printing for a specific printer:
List View
- Select the three dots to the right of the list item.
-
Select Pause.

-
The Queue Status column displays the Paused message for that printer.


Play
To resume printing for a paused printer:
List View
- Select the three dots to the right of the list item.
-
Select Play.

-
The Queue Status column displays the Available message for that printer.
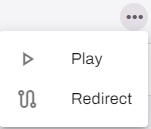

Redirect
To redirect printing from one printer to another:
List View
- Select the three dots to the right of the list item.
-
Select Redirect.
-
In the Select a printer modal, browse to and select the desired printer.

- Select Done.
-
The Queue Status column displays the Redirected message for that printer.

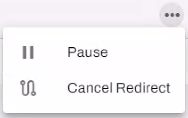
Cancel Redirect
To cancel a printer redirect:
List View
- Select the three dots to the right of the list item.
-
Select Cancel Redirect.

OR
- Select the box next to the printer name.
- Select the Cancel Redirect button in the upper-right.
-
Week Ending In Jan 4th, 2025
-
Released: Dec 27th, 2024
-
Released: Dec 23rd, 2024
-
Android/iOS: Dec 23rd, 2024
-
Released: Dec 9th, 2024