Last updated: August 13, 2024
Offline Secure Release Printing
Offline Secure Release Printing (OSRP) lets users release a print job from a virtual pull print queue even after they have shut down, placed the computer in sleep mode (low power), hibernate mode (no power), or logged out of a virtual session.
Overview
For offline printing, the Service Client holds a copy of the print job until it is released. When PrinterLogic determines that the end-user is offline, and that the end-user is allowed to release offline print jobs, then the Service Client releases the copy to the printer.
Offline Secure Release Printing currently functions with only the Windows client and Windows Service Client.
Prerequisites
On the Service Client machine it is necessary to open certain ports depending on the services you are running, as well as installing OpenSSL.
- TCP 31988 -- PrinterApps service
- TCP 31989 -- OSRP service
- TCP 31990 -- Simple Badge service
- OpenSSL must be installed on the Service Client.
A Service Client is a machine used for several features within the PrinterLogic application. It can be a workstation or a server always available on your network.
- Log in to the Admin Console.
- In the tree view, select the parent folder you would like for the Service Client Object.
-
Click New
 Service Client.
- Right-click on the folder for the same options.
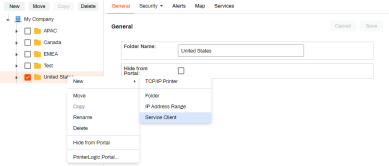
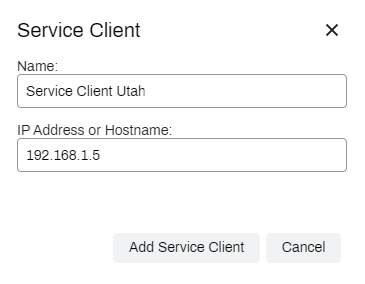
- Add an identifiable name to the Service Client.
-
Enter the IP Address or FQDN of the Service Client host machine.
If using HTTPS, an FQDN is suggested to reduce potential communication issues. This is especially important for CPA manufacturers such as Ricoh, Toshiba, and Kyocera.

- Click Add Service Client.
- The Service Client displays in the tree view under the folder it was added.
- Navigate to the machine designated as the Service Client.
-
In the system tray or start menu, manually Refresh Configurations.
- Verify the service is running via Task Manager.
- Open Task Manager and select the Processes or Details tab.
-
Confirm the PrinterLogicServiceManager.exe process is running along with the three client processes.
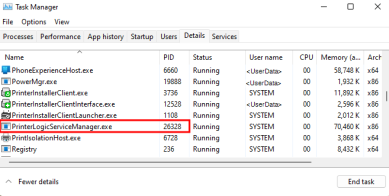
Each service you enable on the Service Client starts a new service viewable in Task Manager.


-
In the Admin Console, click Tools
Settings General.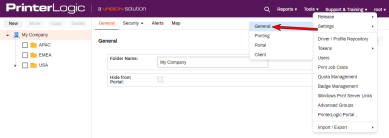
-
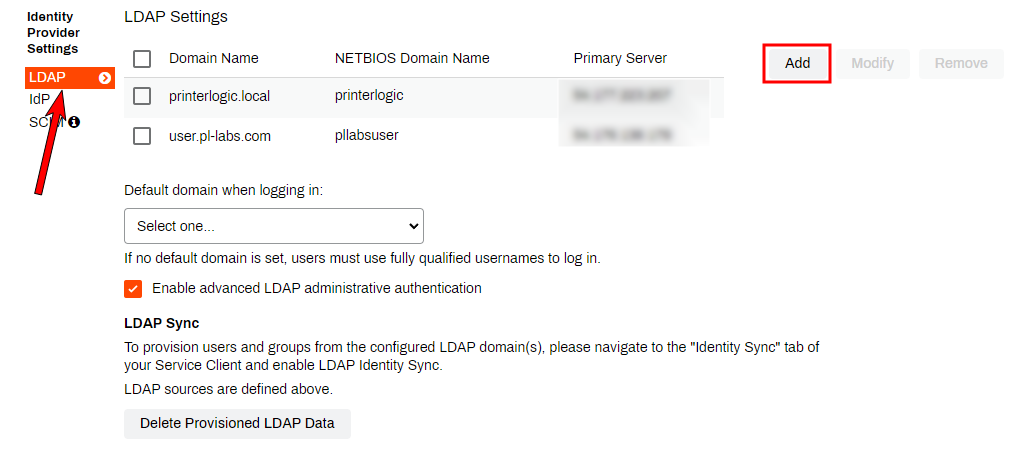
Navigate to the Identity Provider Settings section select LDAP and click Add.

-
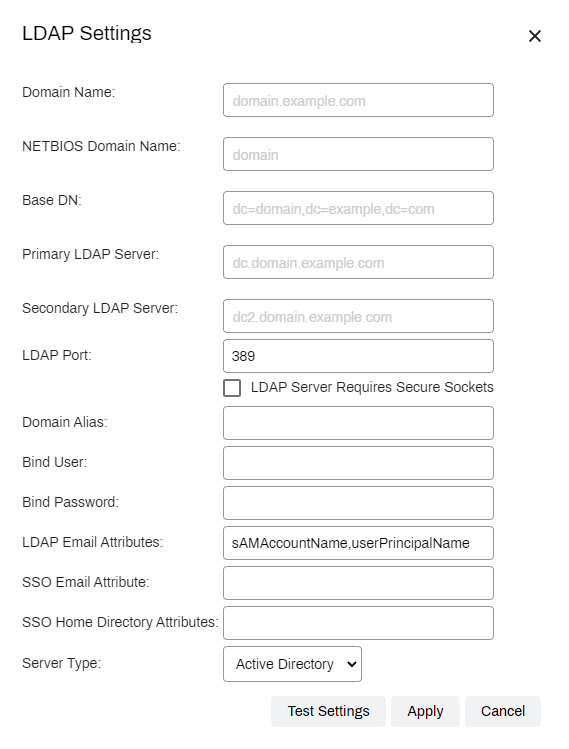
In the LDAP settings window, fill in the required fields. For the core functionality, PrinterLogic does not require LDAP access to be configured. Any time PrinterLogic requires LDAP authentication the LDAP settings apply. For example, if logging into the Admin Console using LDAP credentials, logging into the Self-service Portal with LDAP credentials, and use any advanced features such as CPA, the mobile app, or Email Printing.

- Enter the Domain Name of your LDAP domain and hit the Tab key.
- The NETBIOS Domain Name and Base DN fields should fill in automatically.
-
Add additional information as listed below:
- Primary LDAP Server: The internal (private) IP address or FQDN of your primary LDAP server
- Secondary LDAP Server: The internal (private) IP address or FQDN of your secondary LDAP server. Not required but may be used if needed.
- LDAP Port: Set to 636 or 389 depending on need. Controlled by checkbox below setting.
- LDAP Server Requires Secure Sockets Checked if secure sockets are required.
- Domain Alias: Not required
- Bind User: Bind User Name
- Bind Password: Password for entered Bind User Name
- Server Type: Select the server type you are using.
-
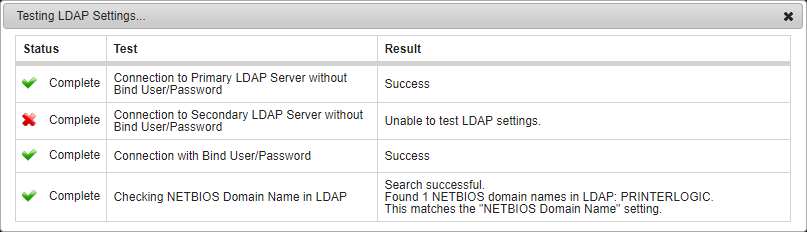
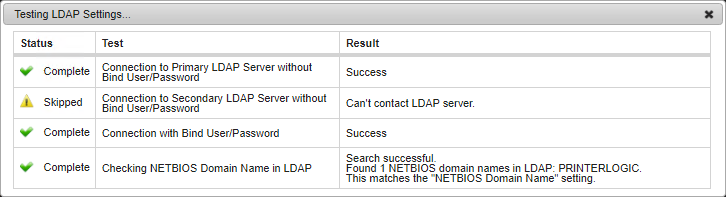
When you finish entering the LDAP settings, click Test Settings to ensure the settings are correct. Successful test results display a green check mark. The Complete status appears whether the test passes or fails, but a red X displays next to the failed test.
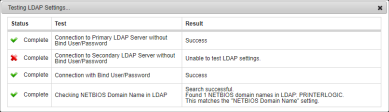
The Skipped status appears if a field in the LDAP settings is left without a value or if the value in the field cannot be found. The Result column displays a message that lets you know the reason it was skipped.

- Click Apply.
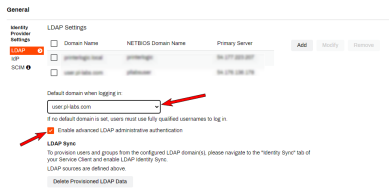
- (Optional) In the Default domain when logging in field, select the LDAP domain you have created.
-
Click Enable Advanced LDAP Administrative Authentication.
- Click Save.


Delete Provisioned LDAP Data
At times it becomes necessary to delete provisioned LDAP users and groups from the PrinterLogic database. The delete function enables IT Admins to remove these items. For legal reasons, PrinterLogic Support cannot remove these and leaves this action to the discretion of the IT Admin. This process requires obvious interaction to remove the user and groups to ensure deletion is the desired outcome.
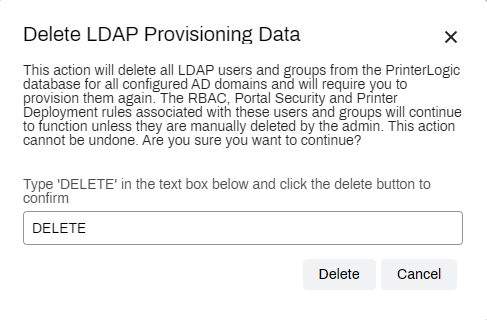
This action will delete all LDAP users and groups from the PrinterLogic database for all configured AD domains and require you to provision them again. The RBAC, Portal Security, and Printer Deployment rules associated with these users and groups will continue to function unless the admin manually deletes them. You cannot undo this action.
FAQ
No, it does not. This function will only remove provisioned data from the PrinterLogic database. You must complete that process within the LDAP server if you need to remove a user.
Process
- In the PrinterLogic Admin Console, navigate to Tools Settings General.
- In the Identity Provider Settings section select the LDAP option.
-
In the LDAP Sync section select the Delete Provisioned LDAP Data option.
- Type DELETE into the text field.
- Click on Delete.
- Click on Save.
Install OpenSSL
OpenSSL performs the encryption of the print jobs waiting to be released. OpenSSL will need to be installed on any Service Clients that are used to hold offline print jobs.
- If not currently installed, install Win32 OpenSSL.
- Add OpenSSL to the PATH variable.
- Windows 10 / Server 2016.
- Click on the Start menu and type path.
- Click on Edit the system environment variables.
- Under the Advanced tab, click on the Environment Variables button.
- Under the System Variables section , click on Path then click Edit.
- In the new popup box, click Edit.
- Double click on the next available empty line.
- Enter the path to the OpenSSL bin folder. For example "C:\Program Files (x86)\OpenSSL-Win32\bin"
- Windows 7 / Server 2012
- Click on the Start menu and type path.
- Click on Edit the system environment variables.
- Under the Advanced tab, click on the Environment Variables button.
- Under the System Variables section, click New.
- For the variable name enter something like "OpenSSL"
- For the variable value enter the path to the OpenSSL bin folder. For example "C:\Program Files (x86)\OpenSSL-Win32\bin"
- Click Ok
- Windows 10 / Server 2016.
- After installing OpenSSL, reboot the machine.
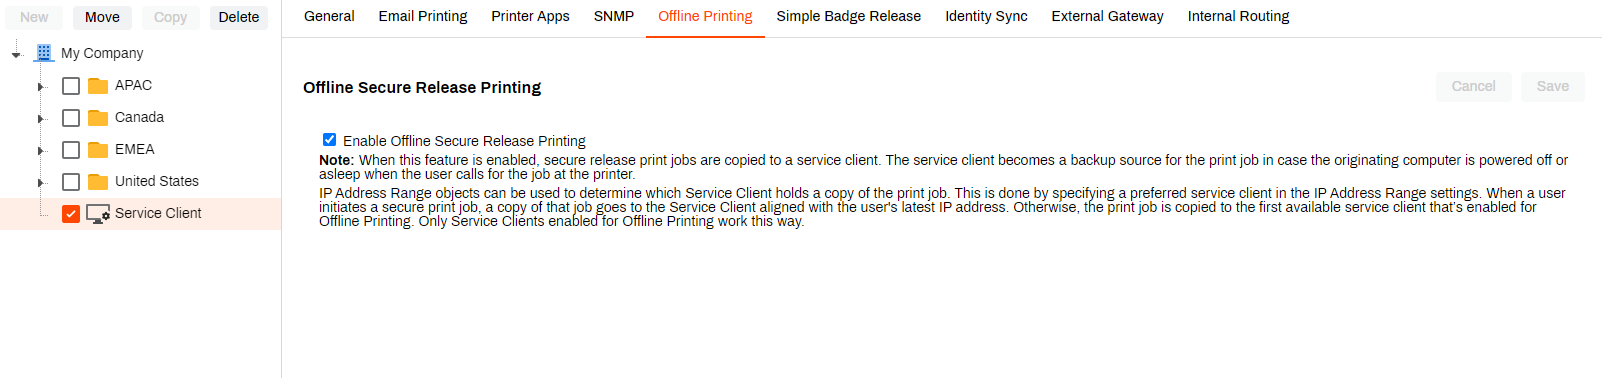
Enable OSRP
Enabling this option starts the PrinterLogicServiceOfflinePrint.exe on the Service Client machine.
- In the Admin Console tree view, select a service client object.
- Click the Offline Printing tab.
-
Click Enable Offline Printing.
- Click Save.
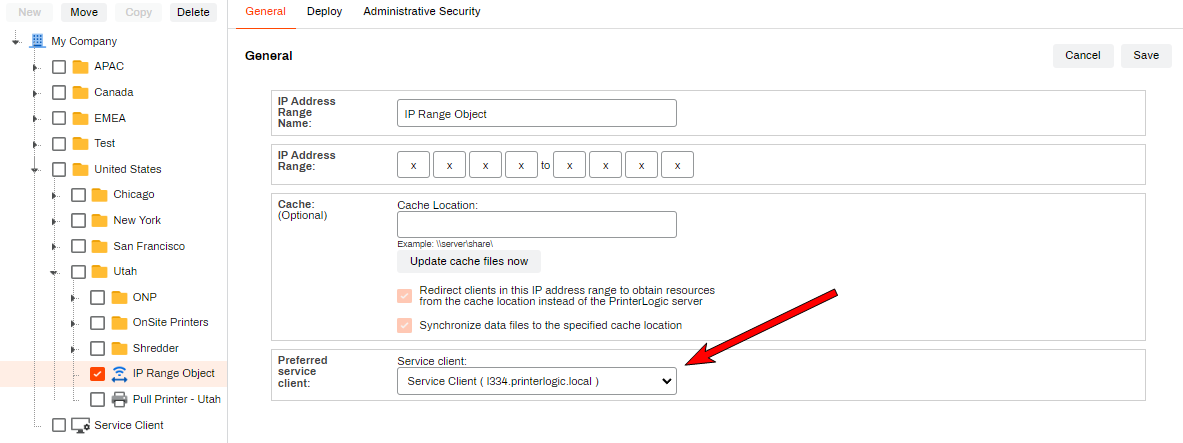
Set Service Client on IP Address Range
Using IP Address objects allows you to designate the service client object used to hold the copy for users within that range.
- In the Admin Console tree view, select an IP Address Range object.
-
In the General tab, select the Service Client drop-down and select the preferred Service Client.
- Click Save.
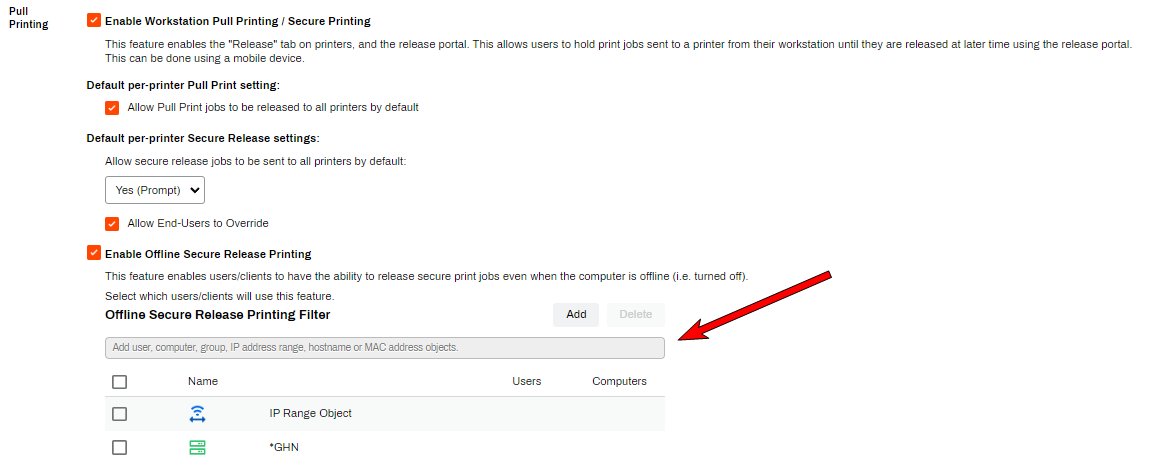
Filter OSRP Users
Use filtering to designate specific users/groups, IP Address Ranges, hostnames, etc. that can use this feature.
- In the Admin Console, click Tools Settings Printing.
-
In the Pull Printing section, click Show Filter.
- Click Add.
- Select the type of filter you would like to add.
- Follow the wizard to set up the filter.
- Click Save.
-
Released: September 3rd, 2024
-
Updated Supported ChromeOS Version
Supports ChromeOS 109+
-
New Mobile App Releases
Released: August 26th, 2024 -
New Host and Application Builds
Released: 8/20/2024
Updated Client Versions Included
-
Set Up Using VMM
Now Supporting Linux KVM Environments