We've Moved!
We've unified our Vasion Print (formerly PrinterLogic) and Vasion Automate documentation into a single, streamlined resource to better serve you. Visit our new unified documentation site: docs.vasion.com
Note: This legacy site will not be updated after January 6, 2025, and will remain available for reference until May, after which all traffic will automatically redirect to docs.vasion.com/a/Get_Started/Automate.htm.

Last updated: January 07, 2025
Connect Google Drive
Google Drive Connection Requirements
To connect Vasion Print (formerly PrinterLogic) to Google Drive you need the following:
- If you need to create a project, you need the permission to create projects or the Project Creator role. For details on how to create a project, see Create a Google Cloud project.
- Google Drive API enabled. For details on how to enable the API, see Enable Google Workspace APIs.
- OAuth Client ID Credentials.
- Client ID and Client Secret details.
- Administrator access to the Admin Console.
Configure the OAuth Consent Screen
If you project doesn't already have the OAuth consent screen configured, use these steps.
- Access your Google Cloud Console and sign in.
- In the top navigation bar, select the project drop-down menu.
- Locate the project you need and select it.
-
Select the hamburger menu, and select APIs & Services
 OAuth consent screen.
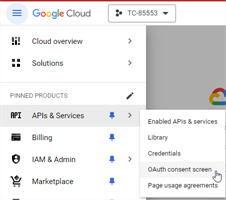
- Select External and then Create.
- On the Edit app registration page complete the following:
- App name — enter a name for the app. This name will show when a user updates their credentials.
- Enter a support email address.
- Upload a logo if desired.
Scroll down to the Authorized Domains section and select +Add Domain.
- In the Authorized Domain field, enter printercloud.com.
- Enter an email address into the Developer contact information field.
- Select Save and Continue.
- On the Scopes page, select Save and Continue.
- On the Test users page select Save and Continue.
- On the Summary page, review the settings and if everything looks good, select Back to Dashboard.

Vasion Automate has a 15 min inactivity timeout. Please be aware that the inactivity timeout applies to the Global Scan Settings screen
Add a Connection
- In another tab, open your Vasion Print (formerly PrinterLogic) Admin Console.
- Select Tools
 Settings Scanning.
 -
For Scan to Cloud (CPA), select the Scan Settings drop-down and enable the toggle for Enable Scanning with Printer Default Settings. You can configure the settings later.

- For Mobile Scan / Scan To Cloud (CPA), select the Cloud Connections drop-down and select Add Connection.
- Select Google Drive, and select Next.

Leave the browser page open on Connect Google Drive.
Create App Credentials
- Return to the Google Console page.
-
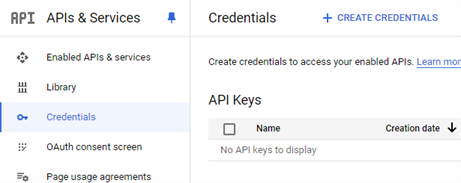
Select Credentials from the side navigation and select + Create Credentials.
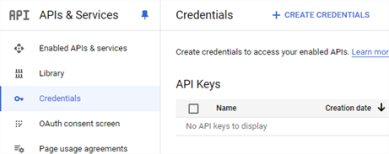
- Select OAuth Client ID.
- On the Create oAuth client ID page complete the following:
- Application Type — use the drop-down to select Web Application.
- Name — enter a name for your web client.
- In the Authorized redirect URIs section select + Add URI.
- Return to the Admin Console Connect Google Drive page and copy the Redirect URI.
- Paste it in the URIs field.
- Select Create.
- Leave the OAuth client created modal open. The Client ID only displays on this modal, be careful and don't close it.
Leave the current browser page open. You will need to copy some values from the OAuth client created modal into the Connect Google Drive page.
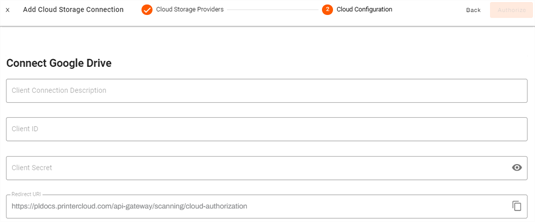
Connect Google Drive
- In the Admin Console Connect Google Drive page complete the following:
- Client Connection Description — enter a description for this connection. This description is displayed in the Cloud Connections section and the Preset Scan Locations Cloud Drive tab.
- Client ID — return to the OAuth client created modal and copy the Client ID, then paste it here.
Client Secret — return to the OAuth client created modal and copy the Client Secret, then paste it here.
It may take from 3-5 minutes for the URI to take effect. Therefore, if the Authorization in the next step fails, you will need to wait and try again once the URI is active.
- Once the URI is in effect, select Authorize.
- In the Google Sign-in modal, enter the Google Credentials used to access the Google Cloud Console.
- In the permissions modal, select Allow.
-
After the connection is verified successfully, select the Return to Dashboard option.

For customers using Scan To Cloud and Mobile Scanning. You are now ready to continue to adjust any global scan settings, add preset scan locations and install Scan To Cloud (CPA). Go to Scan to Cloud for complete details.
-
Week Ending In Jan 4th, 2025
-
Released: Dec 27th, 2024
-
Released: Dec 23rd, 2024
-
Android/iOS: Dec 23rd, 2024
-
Released: Dec 9th, 2024