We've Moved!
We've unified our Vasion Print (formerly PrinterLogic) and Vasion Automate documentation into a single, streamlined resource to better serve you. Visit our new unified documentation site: docs.vasion.com
Note: This legacy site will not be updated after January 6, 2025, and will remain available for reference until May, after which all traffic will automatically redirect to docs.vasion.com/a/Get_Started/Automate.htm.

Last updated: January 07, 2025
Network Scanner
The Network Scanner tool searches networks without a print server and generates a CSV file listing all physical printers with SNMP Simple Network Management Protocol - Protocol for collecting and organizing information about managed devices on IP networks and for modifying that information to change device behavior. Devices that typically support SNMP include cable modems, routers, switches, servers, workstations, printers, and more. configured. Its primary purpose is to audit printing environments and add printers to Vasion Print (formerly PrinterLogic).
Overview
The Network Scanner tool collects data on network print devices, exporting the list in CSV format. It includes device names and IP addresses, facilitating network audits. Administrators utilize this list to identify required drivers for each printer and add them to the Vasion Print (formerly PrinterLogic) Admin Console. Additionally, printers can be imported into Vasion Print (formerly PrinterLogic) using the CSV list with the Data Manager.
Scanning Multiple IP Address Ranges
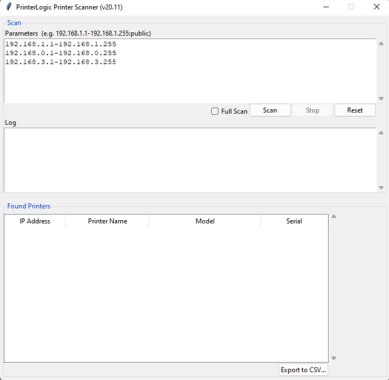
The Network Scanner tool can simultaneously scan up to ten IP address ranges. The required format for each range is <IP address range>-<IP address range> For example: 192.168.3.1-192.168.3.255.
Ensure each IP address range is on a separate line in the Parameters box. Press Enter on your keyboard after adding each entry. If the IP address range information does not follow this format or the list exceeds ten ranges, the scan fails, and you receive an error notification in the Log field.
Run the Network Scanner
-
In the Admin Console, navigate to Tools
 Import / Export
  Network Scanner.
You can close the Network Printer Scanning Utility window once the PrinterLogic Printer Scanner is up and running.
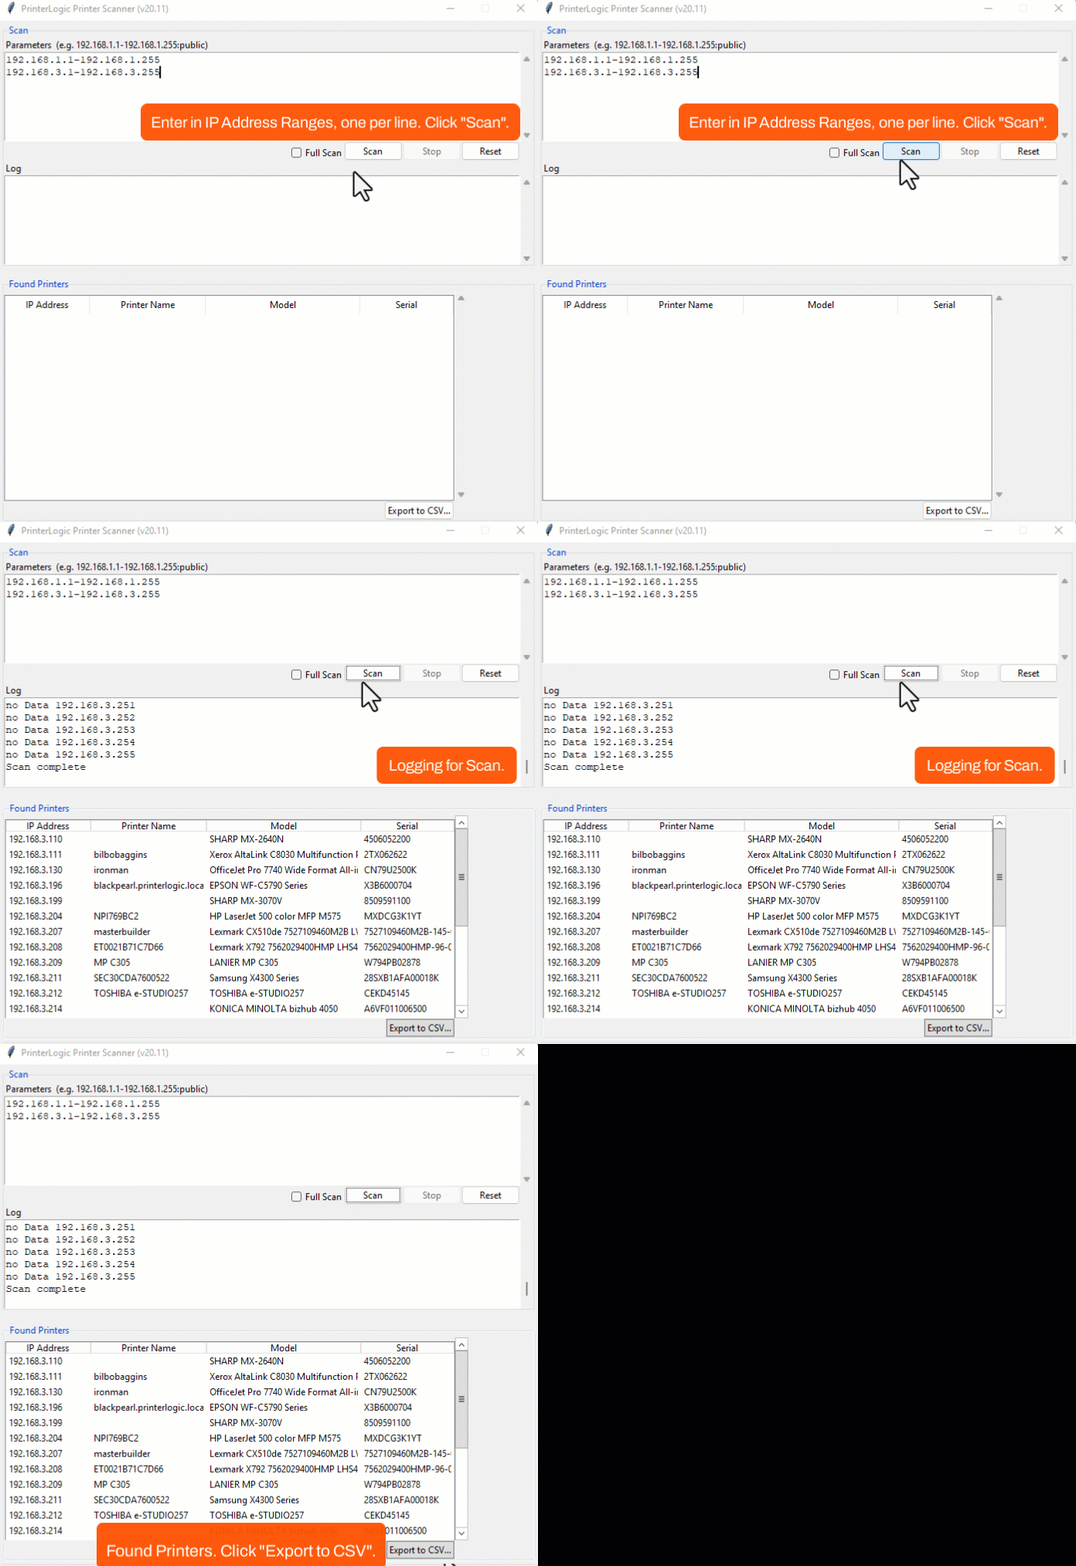
- In the Parameters field, type up to ten IP address ranges to scan using the format <IP address range>-<IP address range>
- Example: 192.168.3.1-192.168.3.255.
- Press ENTER on your keyboard and add any additional entries on their own line.
- Select Scan. The log shows when the scan starts and displays printers as it progresses.
- Select Export to CSV to view the results in a spreadsheet.

Printer List and the Data Manager
When you view the spreadsheet, the system builds some columns and leaves them blank for you to add the printer's driver information, desired name, location, or other necessary fields. After adding this information to the spreadsheet, you can import it using the Data Manager. For bulk updates to existing printers use the Update action, or bulk imports use the Insert action..
If you are using the Data Manager to import printers, the recommended practice is to upload the printer drivers before starting the import. Using the Data Manager, export the Driver list once the drivers are uploaded. Copy the driver name from that exported CSV file and add it to the Printers list driver column for that printer and operating system. The drivers are only assigned if the necessary drivers are in the Admin Console when the Data Manager import runs. If the drivers are not in the Admin Console, you will need to upload and match them manually to the printers. For more information, see Data Manager.
-
Week Ending In Jan 4th, 2025
-
Released: Dec 27th, 2024
-
Released: Dec 23rd, 2024
-
Android/iOS: Dec 23rd, 2024
-
Released: Dec 9th, 2024
