We've Moved!
We've unified our Vasion Print (formerly PrinterLogic) and Vasion Automate documentation into a single, streamlined resource to better serve you. Visit our new unified documentation site: docs.vasion.com
Note: This legacy site will not be updated after January 6, 2025, and will remain available for reference until May, after which all traffic will automatically redirect to docs.vasion.com/a/Get_Started/Automate.htm.

Last updated: January 07, 2025
Data Manager
IT administrators frequently utilize the Data Manager for printer migration, to make bulk naming changes to printers in an environment and as a tool for adding and removing printers.
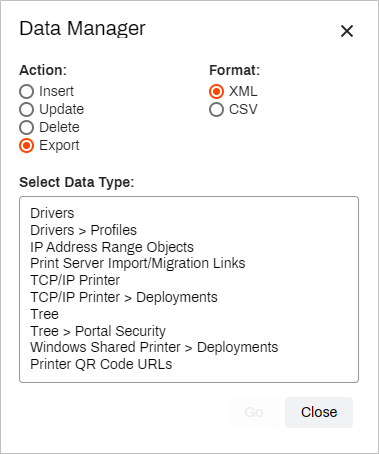
Actions
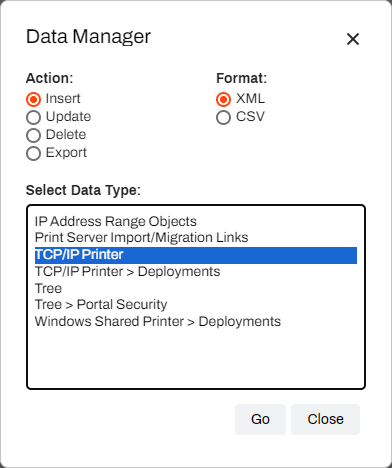
With the Data Manager, you can perform four types of actions:
- Insert — adds new bulk objects of the specified data type.
- Update — adjusts existing objects of the specified data type.
- Delete — removes existing objects of the specified data type.
- Export — exports a list (.xml/.csv) of the specified data type.
The Insert, Update, and Delete actions require you to import a XML / CSV file containing the data you want to add, change, or remove. Each data type uses a specific template, so we recommend you use the Export feature in the Data Manager to export the template first, make your changes, and then insert, update, or delete your data.
Data Type
Data type refers to printer-related deployment and management tasks. Examples include driver associations, printer names, IP Address ranges, etc. Depending on the action you select you can choose from one of the following options:
- Drivers — a list of driver information, such as driver model name, internal date, version, OS supported, etc.
- Drivers
 Profiles — a list of driver profile information, such as profile name, modified date, printer model, etc.
 - IP Address range Objects — the list contains IP Address range objects found in the Tree View. It includes information on their location within the tree structure, the title given to the range, start and end IP addresses, etc.
- Print Server Import / Migration Links — the list contains information about the print server used to import / migrate. The list Includes information such as server DNS name, server IP address, server AD path, printer share name, etc.
- TCP / IP — the list includes information specific to TCP / IPs, such as the printer location in the tree structure, printer name, comments, install URL, enabled print options, associated driver, etc.
- TCP / IP Deployments — a list of information on deployments made, such as the tree structure folder that contains deployed items, printer name, deployment type, etc.
- Tree — the list defines the contents of the tree structure, including parent folder names, object names within those folders, object types, etc.
- Tree Portal Security — the list provides information about the usage of Portal Security, including the folder or printer where it's applied and the object name / type defined in the assignment, such as a user, group, container, OU, etc.
- Windows Shared Printer Deployments — this is a list of information about Windows shared printers and their deployments. The list contains information on the folder containing shared printer objects, deployment methods, etc.
- Printer QR Code URLs — this is a list of QR code URLs for printers in the tree view. You can use these QR Codes with the PrinterLogic App to quickly scan and release held print jobs. This list gives the printer's generic URL, which you can use in another QR code generator to customize the code. By inserting the URL in the generator, further customization, such as inserting an image in the URL, can be done to add more security and ensure users scan the correct URL with their mobile device to release print jobs.
Formats
The format refers to the file type you upload or download. CSV and XML are supported, with XML being the preferred format. The available data type depends on the action you select.
XML supports international symbols and formatting, while CSV does not. Therefore, we recommend using XML instead of CSV.
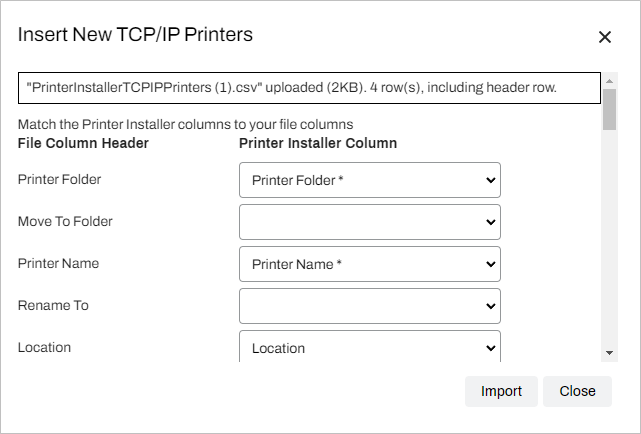
When uploading a file for any action, you can also "map" the columns in the spreadsheet of the .xml/.csv file to the fields in Vasion Print (formerly PrinterLogic). The column on the left mirrors the header row of the XML / CSV file, while the column on the right auto-populates if it finds a matching field in Vasion Print (formerly PrinterLogic).
Using the Data Manager
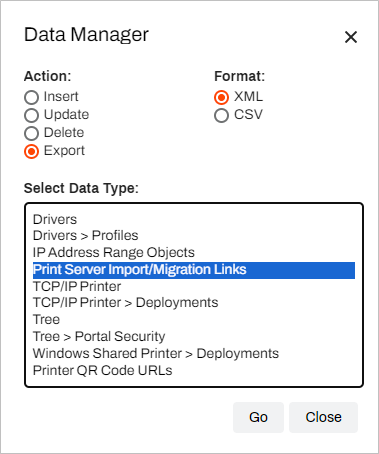
Export
- In the Admin Console, navigate to Tools
 Import / Export Data Manager.
 - Select Export from the Action list.
- In Select Data Type, select the data type you wish to change.
-
In Format, choose the desired file scheme XML / CSV.
- Select Go.
The file automatically downloads to your computer. You can open it with your preferred spreadsheet software.
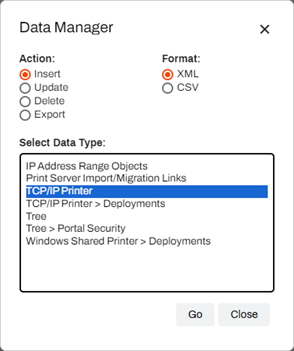
Insert, Update or Delete
- In the Admin Console, navigate to Tools Import / Export Data Manager.
- From the Actions list select one of the following:
- Insert — add new bulk objects of the specified data type
- Update — adjust existing objects of the specified data type.
- Delete — remove existing objects of the specified data type.
- In Format, select the file schema you want to use.
-
Select Go.
-
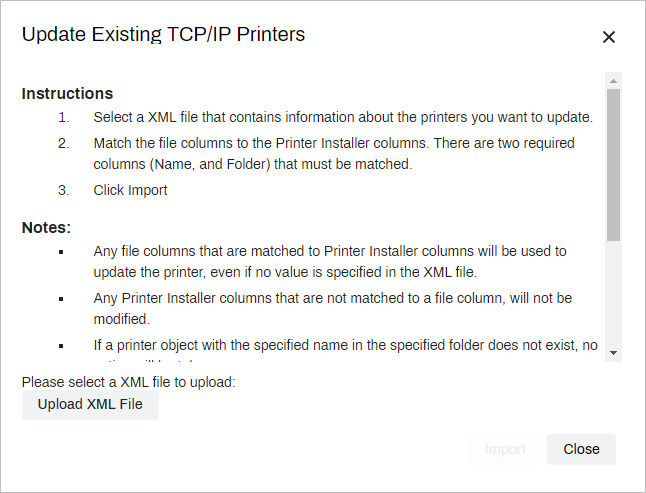
In the upload modal select Upload XML File. The button reflects the file schema you selected. Detailed instructions are included in the modal.
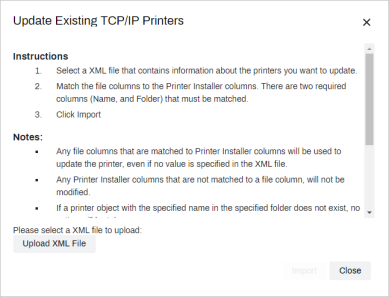
- Navigate to the file you want to upload and select Open.
-
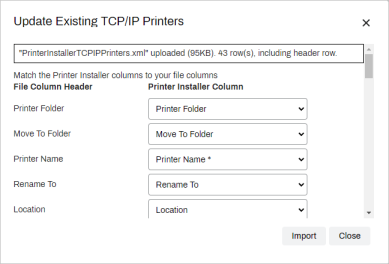
Match the columns in the file header row to the corresponding Vasion Print (formerly PrinterLogic) fields.
- Insert / Update — If the file has a header column that matches a field in the Printer Installer Column, but the row in the column does not contain data, then the column remains blank. You can manually select any column to apply the data from it.
-
Delete — Under the Printer Installer Column, select the Vasion Print (formerly PrinterLogic) fields from which you want to delete data. The fields under the Printer Installer Column auto-populate if a scan finds a corresponding field in Vasion Print (formerly PrinterLogic). Deselect any fields as needed.
Leave any fields blank that you don't want to delete.
-
Select Import / Delete.
- When the import or delete is complete, a message displays the import results and any errors that occurred during the procedure. Select Close/OK.

-
Week Ending In Jan 4th, 2025
-
Released: Dec 27th, 2024
-
Released: Dec 23rd, 2024
-
Android/iOS: Dec 23rd, 2024
-
Released: Dec 9th, 2024