Last updated: November 14, 2024
Additional Admin Console Security
The topic below discusses an extra level of security using a group attribute statement related to the Entra ID (Azure AD) and Okta identity provider configurations. While not commonly used, some organizations require this additional security level. Please read the following thoroughly to determine if this is something your organization needs.
Users and groups provisioned to the Virtual Appliance application must be added to the Users list, Tools ![]() Users, within the Admin Console and assigned a specific role before they can log in. Without the group attribute statement, multiple groups or users added to the Users list can log in. This is normal behavior where admins define access within the application. With the group attribute statement, only members of a single group defined within the identity provider can access the Admin Console. All other Admin Console login attempts will fail, even from other users and groups added to the Users list, since the login fails at the identity provider level rather than the Admin Console level.
Users, within the Admin Console and assigned a specific role before they can log in. Without the group attribute statement, multiple groups or users added to the Users list can log in. This is normal behavior where admins define access within the application. With the group attribute statement, only members of a single group defined within the identity provider can access the Admin Console. All other Admin Console login attempts will fail, even from other users and groups added to the Users list, since the login fails at the identity provider level rather than the Admin Console level.
Organizations using the group attribute statement must create a group containing all desired Admin Console users and define it within the identity provider. The role applied within the Admin Console applies to all members within the group. Apply roles to individual users in the Users list for different access levels.
Remember this when applying the role to the group in the Users list. If not all group members should have administrator access, then apply a non-administrator role (e.g., Help Desk, Site Manager) to the group. To grant higher permissions, apply the administrator or other roles to individual users from the group.
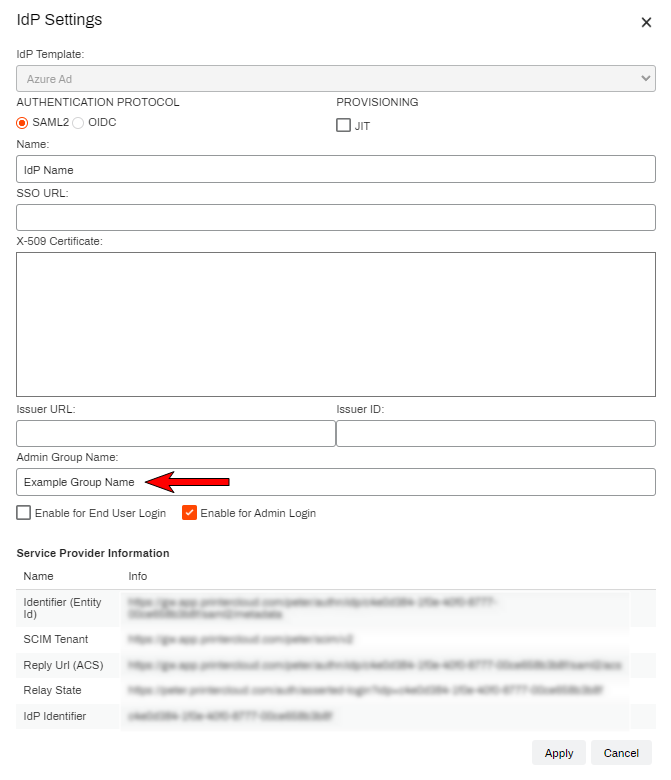
If you are not interested in using this option, the Virtual Appliance Admin Group Name field within the IdP Settings template must be left blank. Adding a value there will deny login access for groups and users within groups that do not match the value.
Entra ID (Azure AD)
Define the Entra ID (Azure AD) Admin Group
By default, the Admin Group is designed to be called PrinterLogicAdmin. If this needs to be changed, ensure you adjust the 6. Modify the Manifest File section value to match the name you give your admin group.
- In your Entra ID (Azure AD) Portal, ensure you have a group created called PrinterLogicAdmin that contains all users you want to have any level of access into the Virtual ApplianceAdmin Console.
- Ensure this group is assigned the Entra ID (Azure AD) app you created for the Admin Console.
If your admin group is not named PrinterLogicAdmin, the manifest file will need to be updated within Entra ID (Azure AD).
- In your preferred browser, navigate to the Entra ID (Azure AD) Portal at https://portal.azure.com/#home and log in with your credentials.
- In the Entra ID (Azure AD) Portal select App Registrationsin the Azure services section or use the search bar to search and select it.
- In the App registrations page, search for and select the app you created.
-
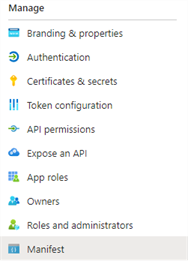
Select Manifest in the left-side Manage menu.

-
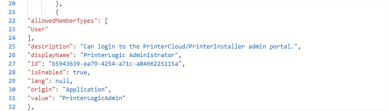
Locate the Virtual Appliance code, normally located in lines 49-60.
-
Adjust the "PrinterLogicAdmin" portion of the line "value": "PrinterLogicAdmin" to match the desired admin group name.
Entra ID (Azure AD) shows this value on line 59.
- Select Save

Define Virtual Appliance Admin Group Name
- In your Virtual Appliance Admin Console go to Tools
 Settings General.
 - In the Identity Provider Settings section, select IdP, select your IdP app, then select Modify.
- In the Admin Group Name field type the same group name you entered in the IdP.
- Select Apply, then select Save.
Add Group / User Roles
- If this group was not added to the Users list when you configured the IdP initially, go to Tools Users.
- Select Add User IdP Group / User Group.
- Select Search (no text input required, however searching by group name may have faster results).
- Select the check box next to the defined group, then select Add.
-
Assign the appropriate role for the group.
Only add this group with an Administrator role if you want ALL members in the group to have FULL access to the Admin Console and feature settings. If not all group members should have administrator access, then apply a non-administrator role (e.g., Help Desk, Site Manager) to the group. To grant higher permissions, apply the administrator or other roles to individual users from the group.
Members of the group used will now have access to the Admin Console when logging in.
Okta
The group attribute statement is only available for SCIM provisioning and is not compatible with JIT provisioning.
Define the Okta Group
- In your Okta Portal, ensure you have a group created that contains all users you want to have any level of access into the Virtual Appliance Admin Console.
- Ensure this group is assigned the Okta app you created for Virtual Appliance.
- Reference Assign Users / Groups (SCIM Provisioning).
To define the group within the Okta app:
- Log into your Okta Portal.
-
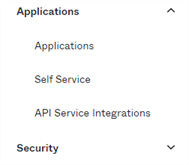
In the left-side menu, expand Applications and select the Applications option.

- Select your configured Virtual Appliance app.
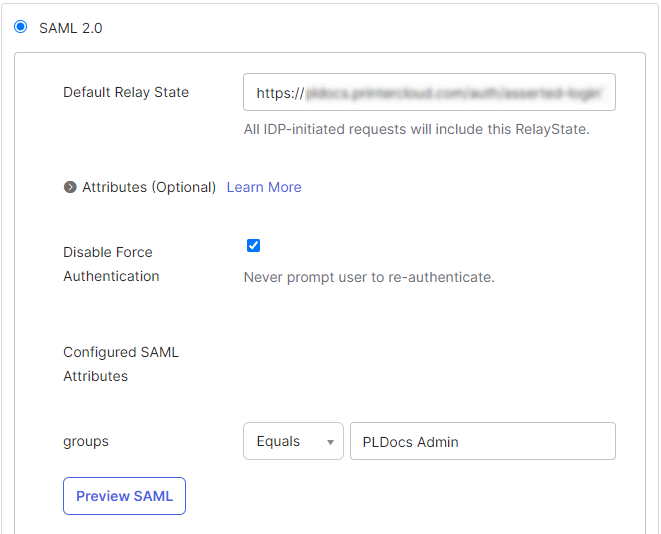
- Select the Sign On tab of the Okta app, then select the Edit link on the right.
-
In the groups field, select the Equals filter from the drop down.
-
In the blank field provided, enter the name of the group you have assigned to the app for exclusive access to the Virtual Appliance Admin Console.
- Select Save
Note the spelling, the entry made in Virtual Appliance must be an exact match.
Define Virtual Appliance Admin Group Name
- In your Virtual Appliance Admin Console go to Tools Settings General.
- In the Identity Provider Settings section, select IdP, select your IdP app, then select Modify.
- In the Admin Group Name field type the same group name you entered in the IdP.
- Select Apply, then select Save.
Add Group / User Roles
- If this group was not added to the Users list when you configured the IdP initially, go to Tools Users.
- Select Add User IdP Group / User Group.
- Select Search (no text input required, however searching by group name may have faster results).
- Select the check box next to the defined group, then select Add.
-
Assign the appropriate role for the group.
Only add this group with an Administrator role if you want ALL members in the group to have FULL access to the Admin Console and feature settings. If not all group members should have administrator access, then apply a non-administrator role (e.g., Help Desk, Site Manager) to the group. To grant higher permissions, apply the administrator or other roles to individual users from the group.
Members of the group used will now have access to the Admin Console when logging in.
-
Released: November 21st, 2024
Updated Application Version Included
-
New Mobile App Release
iOS: November 11th, 2024 -
Released: November 11th, 2024