Last updated: November 21, 2024
Web Print User Guide
The steps below guide users through using the Web Print Portal to send and release print jobs.
Using Web Print
1. Access the Web Print Portal
Your Web Print Portal is your instance URL with /webprint at the end. Reach out to your local admin with any questions about reaching the portal.
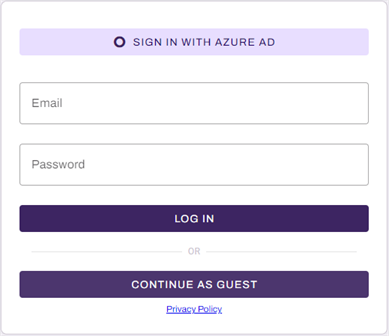
- Navigate to your Web Print Portal.
- Log in to the portal, or select Continue As Guest.
2. Upload Documents
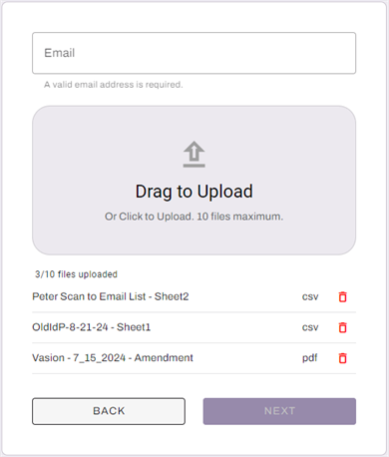
- If you selected the Continue As Guest option, enter your email in the Email field. This field does not display for logged in users.
- Use the Drag or Click field to upload your file(s).
- Uploaded files display below.
- Use the trash can icon to delete unwanted uploads.
- Select Next.
2. Adjust Print Settings
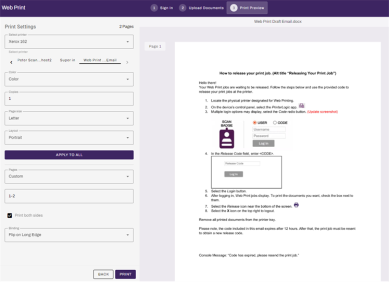
On the Print Settings page:
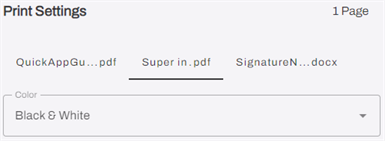
- Select Color or Black & White.
- The color option is only available if enabled by your admin.
- Enter the amount of Copies.
- Select the Page Size.
- Options are what your admin enabled (Letter, Legal, Tabloid, A4).
- Select the Layout.
- Options are Portrait and Landscape.
- Select the Pages to send. Options are:
- All (Prints all pages).
- Custom (Print specific pages, e.g, 1-5,8,11-13).
- Optional: Select Print both sides.
- Select the desired Binding option.
- Flip on Long Edge.
- Flip on Short Edge.
- Select the desired Binding option.
Different uploads may require different print settings. Select the Apply To All button to apply the defined print settings to all uploaded documents. OR select the document title in the upper-left to navigate to a different upload and adjust its settings.
3. Print
After selecting Print, the prompts differ depending on the Secure Release settings enabled for the printer object.
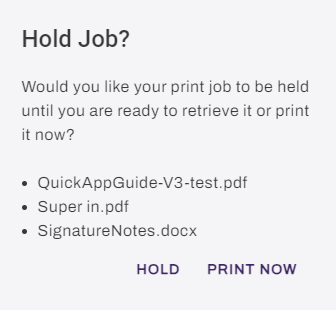
- Printer objects configured to prompt the user first, display a Hold Job? modal (Hold or Print Now options).
- Printers configured to hold all jobs automatically display a Print Held modal (Done or New Print options).
- Printers configured to immediately print jobs sent to them display a Print Complete modal (Done or New Print options).
- Select Print in the lower-middle.
- Selecting Back takes you back to the upload screen.
- In the pop-up modal, select the desired option.
- Once the job processes, select Done to log out or New Print to send another print job.
Releasing Held Jobs
If you selected Hold or were shown the Print Held modal in the previous step, your print job is waiting to be released.
Authenticated Users
These steps are for users who logged into the Web Print Portal and did not select the Continue as Guest option.
- Navigate to the physical printer designated for Web Print.
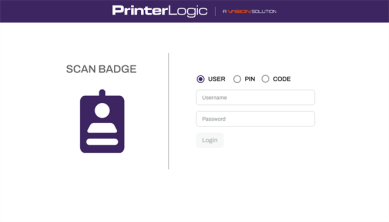
- On the devices control panel, select the PrinterLogic app.
- Login with your credentials, or configured authentication option.
- Once logged in, select the print job(s) you want to release.
- Select the printer icon to release and print your document(s).
- Select the X to log out of the application.
- Retrieve your print jobs from the paper tray.
Guests
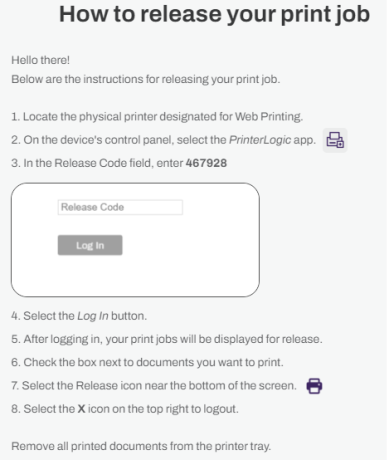
If you selected the Continue as Guest option and entered your email, instructions about releasing the print job were sent to that email. The email includes the code needed to release the print job. Below is an overview of the emailed steps.
- Navigate to the physical printer designated for Web Print.
- On the devices control panel, select the PrinterLogic app.
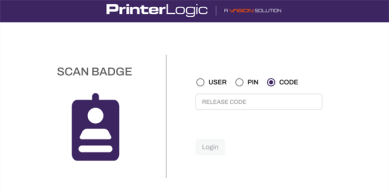
- Select the CODE or Release Code login option.
- Enter the six-digit Release Code received in the How to release your print job email.
- Once logged in, select the print job(s) you want to release.
- Select the printer icon to release and print your document(s).
- Select the X to log out of the application.
- Retrieve your print jobs from the paper tray.
Example email for reference:
-
Released: November 21st, 2024
Updated Application Version Included
-
New Mobile App Release
iOS: November 11th, 2024 -
Released: November 11th, 2024
