Last updated: November 14, 2024
Secure Print Settings User Guide
The Secure Print Settings modal lets you designate your Secure Release printers and turn on / off "hold" prompts when sending print jobs to them. The steps below guide you through accessing the Secure Print Settings window and adjusting Secure Release printers.
Access Secure Print Settings
There are two options to access the Secure Print Settings modal. In your operating system Search bar, search for and select Secure Print Settings, or:
Tray / Menu Icon
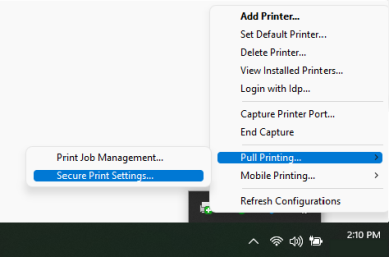
- Right-click on the Virtual Appliance icon in the system tray or notification area.
- Hover over the Pull Print option.
- Select the Secure Print Settings option.
Secure Print Settings
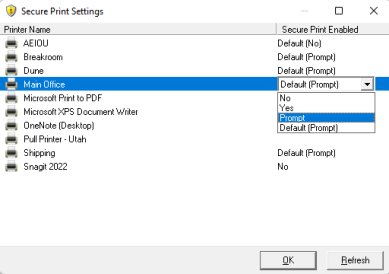
The Secure Print Settings modal displays installed printers and shows whether Secure Release Print's enabled. If your administrator has enabled the end-user override, you can adjust the secure print settings for installed printers. To adjust settings, use the dropdown in the Secure Print Enabled column to select the desired option. If you can access the Secure Print Settings modal but cannot make adjustments, your administrator hasn't enabled the end-user override option.
- Default (No) / No
- Secure Release Print is not enabled for this printer. Print jobs sent to this printer print immediately.
- Default (Yes) / Yes
- Secure Release Print is enabled. Print jobs sent to this printer hold the job for later release.
- Default (Prompt) / Prompt
-
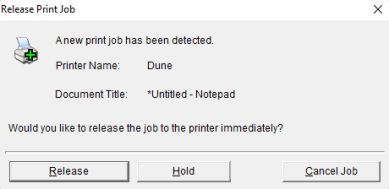
Secure Release Print is enabled. When you send a print job to this printer you receive a prompt asking if you want to print or hold the job for later release.
-
Released: November 21st, 2024
Updated Application Version Included
-
New Mobile App Release
iOS: November 11th, 2024 -
Released: November 11th, 2024


