We've Moved!
We've unified our Vasion Print (formerly PrinterLogic) and Vasion Automate documentation into a single, streamlined resource to better serve you. Visit our new unified documentation site: docs.vasion.com
Note: This legacy site will not be updated after January 6, 2025, and will remain available for reference until May, after which all traffic will automatically redirect to docs.vasion.com/a/Get_Started/Automate.htm.

Last updated: January 07, 2025
Email Print User Guide
With Email Printing, you can send an email to the designated printer where the email and / or attachments print. Email Printing jobs sit in a universal print queue until you release them using the Release Portal A web page users log into to see print jobs that are held and waiting to be sent to physical printers., badge release, the PrinterLogic App, or any other mechanism set up by your administrator. If allowed, you can also define a printer in the Self-service Portal Web page that end users can self install printers. to release email jobs automatically.
The steps below guide you through releasing Email Printing jobs or setting up auto-release to a specific printer.
Release Portal
If you are new to the Release Portal, there are two ways to access it.
- Navigate to your portal. The Release Portal is your Self-service Portal URL with /release after it.
-
Navigate to your Self-service Portal. For example: mycompany.printercloud.com.
- Select Menu.
-
Hover over Email Printing and select Print Job Management.

Depending on the configuration, if the Email Printing option does not display, hover over Pull Printing and select Print Job Management.

To use the Release Portal, do the following:
- Select the jobs you want to print.
- Select Release.
-
On the Select a printer modal search or browse for a printer configured for Email Printing jobs.

- Check the box next to the printer you want to use.
- Select Release.


Automatic Release
If your administrator enables the option, you can set a default printer to automatically release your email print jobs. Here are the steps to set up your default printer.
- Navigate to your Self-service Portal.
- Select Menu.
-
Hover over Email Printing and select the sub-option for Set Email Pull Printer.
-
In the Set Email Pull Printer modal, select the Set Printer button.
-
On the Select a printer modal to search or browse for a printer configured for Email Printing jobs and select it.
-
Select Close.
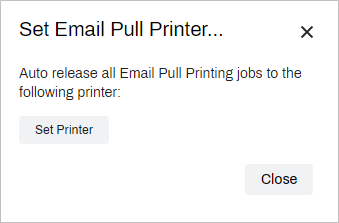

Email Printing jobs auto-release to this printer for this user.
Change the Printer
- Navigate to your Self-service Portal.
- Select Menu.
- Hover over Email Printing and select Set Email Pull Printer.
- In the modal, select the Change Printer button.
- On the Select a printer modal to search or browse for a printer configured for Email Printing jobs.
- Select Close.
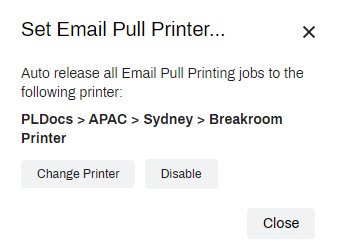
Disable Auto-Release
- Navigate to your Self-service Portal.
- Select Menu.
- Hover over Email Printing and select Set Email Pull Printer.
- In the modal, select the Disable button.
- Select Close.
When disabled, you must use the Release Portal to release Email Printing jobs. You can enable this option again by following the steps above.
-
Week Ending In Jan 4th, 2025
-
Released: Dec 27th, 2024
-
Released: Dec 23rd, 2024
-
Android/iOS: Dec 23rd, 2024
-
Released: Dec 9th, 2024