We've Moved!
We've unified our Vasion Print (formerly PrinterLogic) and Vasion Automate documentation into a single, streamlined resource to better serve you. Visit our new unified documentation site: docs.vasion.com
Note: This legacy site will not be updated after January 6, 2025, and will remain available for reference until May, after which all traffic will automatically redirect to docs.vasion.com/a/Get_Started/Automate.htm.

Last updated: January 07, 2025
CyberArk
An Identity Provider (IdP) vouches for the identity of a person through the use of an authentication token. Vasion Print (formerly PrinterLogic) uses IdP for several things, including logging in to the Admin Console and portals, deploying printers, releasing print jobs, and more.
If you use an IdP, the Control Panel Application (CPA) only supports badge and PIN authentication.
Configure Connection
To add and configure app properties for the Vasion Print (formerly PrinterLogic) connection do the following:
- Create CyberArk App.
- Add IdP Template.
- Configure Single Sign On.
- Add the X-509 Certificate.
- Complete IdP Settings.
- Configure Provisioning.
- Add Vasion Print (formerly PrinterLogic) Admins.
1. Create CyberArk App
- In your preferred browser log in to your CyberArk Admin Portal.
-
Select Apps & Widgets, then select Web Apps.

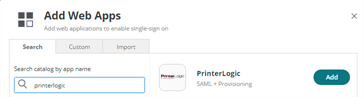
- In the Web Apps page, select Add Web Apps from the top-right corner.
- In the Search tab, search for and select the PrinterLogic app.
-
Select Add..

- In the Add Web App modal, select Yes to add the application.
- Select Close on the Add Web Apps window.
- Give your app a name and select Save.


Leave the current browser open to the new app page. To continue the app configuration, you need to open another browser and open the
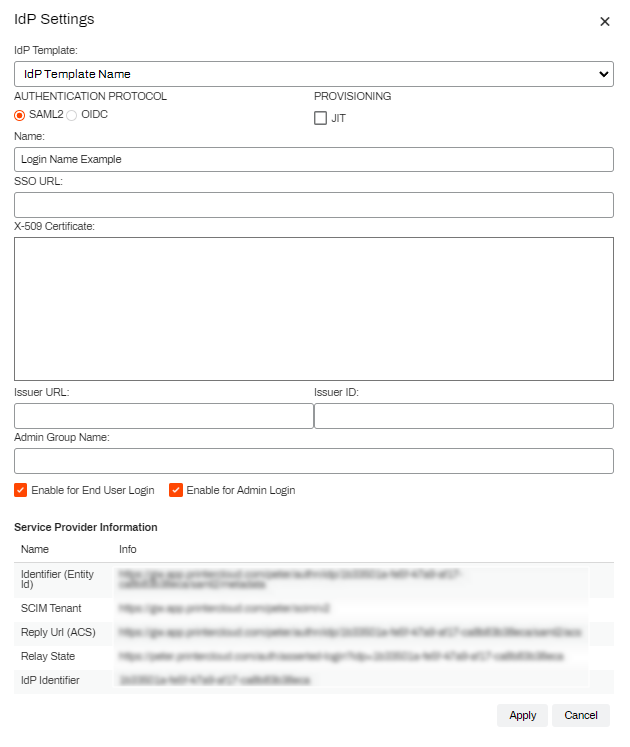
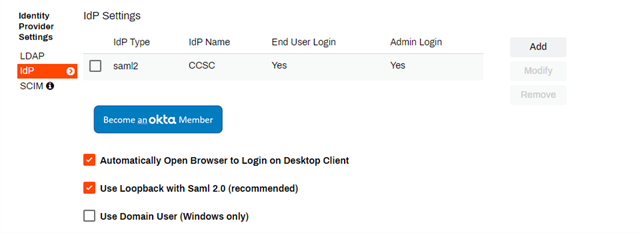
If the IdP Settings page does not look like the image shown below, you may not be using the latest version and should contact Product Support to upgrade your IdP settings.
2. Add IdP Template
When configuring this IdP through Vasion Print (formerly PrinterLogic), use the Custom option in the IdP Template drop-down.
- In a separate browser tab, open your Vasion Print (formerly PrinterLogic) Admin Console and sign in.
- Select Tools
 Settings General, and scroll down to the Identity Provider Settings section.
 - Select IdP, and then select Add.
- Select the identity provider you want to configure in the IdP Template drop-down.
- Select SAML2 in the Authentication Protocol section.
-
In the Provisioning section if you are using SCIM, leave the JIT option unchecked.
By default, it is assumed you are using SCIM for provisioning. Only select JIT if SCIM is not being used.
- In the Name field, enter the name you want displayed on the login button for users, e.g. My Company, Login, Acme Corp, etc.
- Scroll down and select the desired enable setting(s).
- Enable for End Users Login — Allows end users to login using this IdP. (Self-service Portal)
- Enable for Admin Login — Allows Admin users to login using this IdP. (Admin Console)
- Both boxes can be checked when using a single IdP, or if the admin and end users use the same IdP to log in.
Keep the IdP Settings screen open so that the Service Provider Information at the bottom is available for the following steps.
3. Configure Single Sign On
- In the CyberArk app side menu, select Trust.
- In the Identity Provider Configuration section, select the Manual Configurationoption.
- Copy the CyberArk Sign In URL and paste it into the Vasion Print (formerly PrinterLogic) Admin Console IdP Settings window's SSO URL field.
- Copy the CyberArk Issuer URL and paste it into the Admin Console Issuer URL field.
-
Cut the numerical portion (after app/) from the Issuer URL and paste it into the Admin Console Issuer ID field.
Example: Issuer URL:
https://abc1234.my.idaptive.app/, Issuer ID:a1b2cd34-fb1f-4f71-9248-8675309d/ - Return to CyberArk, scroll down to the Service Provider Configuration section, and select Manual Configuration.
- Copy the Admin Console Identifier (Entity ID) URL and paste it into the CyberArk SP Entity ID/ SP Issuer/Audience field.
- Copy the Admin Console Reply URL (ACS) and paste it into the CyberArk Assertion Consumer Service (ACS) URL field.
- In the CyberArk Recipient section, check the box for Same as ACS URL.
- In the Sign Response or Assertion field, select Assertion.
- Copy the Admin Console Relay State URL and paste it into the CyberArk Relay State field.
- Select Save in CyberArk.

4. Add the X-509 Certificate
- Return to CyberArk Identity Provider Configuration section and expand the Signing Certificate option.
- Select Download.
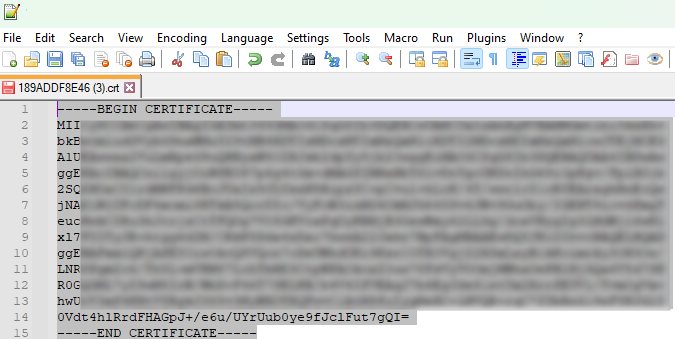
- Open the file in your preferred text editor.
-
Copy the certificate body, including the Begin / End Certificate headers, and paste it into the Vasion Print (formerly PrinterLogic) X-509 Certificate field.

- Select Apply in Vasion Print (formerly PrinterLogic).
- Select Save at the top-right corner of the General page.

5. Complete IdP Settings
- On the Admin Console General page, navigate back to the Identity Provider Settings section.
-
To have Vasion Print (formerly PrinterLogic) prompt your users to authenticate through the IdP when performing any function requiring authorization, such as installing a printer, select the Automatically Open Browser to Login on Desktop Client option.
If this option is not selected, the user must manually navigate to the IdP login screen to sign in.
-
We recommend enabling the Use Loopback with SAML2 option. The IdP needs to provide an authentication token to the desktop clients whenever authentication happens. This option allows the client to handle the token and automatically log in without interaction from end users.
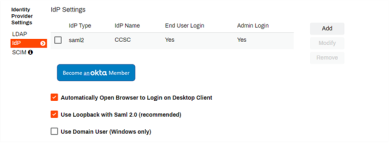
- The option to Use Domain User (Windows only) will automatically authorize domain-joined Windows users and not require login via the configured IdPs.
- Select Save in the top-right corner of the General page.
6. Configure Provisioning
The provisioning steps vary depending on whether you are using SCIM or JIT provisioning. Please choose the appropriate option below to view the corresponding steps for the method you are using.
SCIM Provisioning
Enable SCIM Provisioning
- Select Provisioning in the left menu of the CyberArk app.
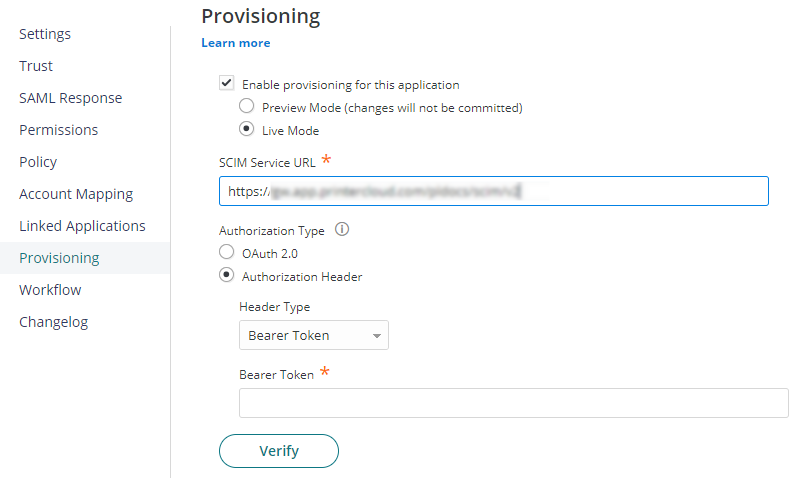
- Check the box for Enable provisioning for this application then select Yes to proceed.
- Select Live Mode.
- In the Vasion Print (formerly PrinterLogic) Admin Console, select the IdP and then select Modify.
-
In the IdP Settings window, copy the SCIM Tenant from the Service Provider Information section, then paste it into CyberArk's SCIM Service URL field.
- In the CyberArk Authorization Type section select Authorization Header, and for the header type select Bearer Token.
- Close out of the Admin Console IdP Settings window.
Generate SCIM Token
- In the Vasion Print (formerly PrinterLogic)General settings, select the SCIM option in the Identity Provider Settings section.
- Select your IdP configuration in the drop-down menu.
-
Select Generate SCIM Token.

Generating a SCIM token invalidates any previous tokens for that IdP.
- Select Proceed.
- Copy the token, close the modal, and select Save at the top-right corner of General settings.
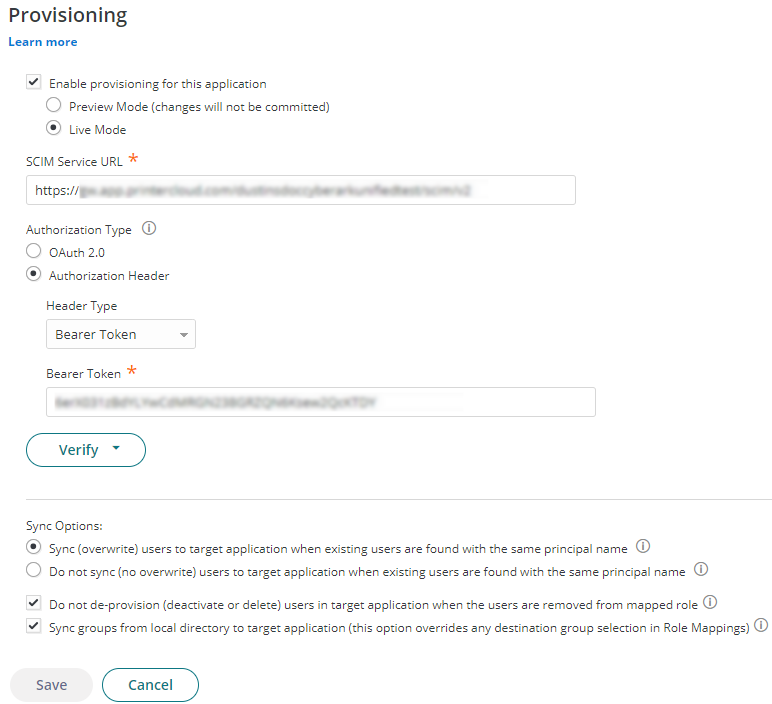
- Paste the token in CyberArk's Bearer Token field.
- Select the Verify button to ensure communication.
- In the Sync Options, enable the settings below:
- Sync (overwrite) users to target application when existing users are found with the same principal name.
- Do not de-provision (deactivate or delete) users in target application when the users are removed from mapped role.
- Sync groups from local directory to target application (this option overrides any destination group selection in Role Mappings).
- Disable user.
- Deprovision (deactivate or delete) users in this application when they are disabled in the source directory.
- Select Save in CyberArk.

Add Roles / Users
-
In the CyberArk admin portal side navigation under Core Services, select Roles.
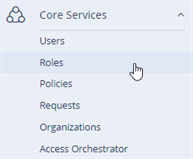
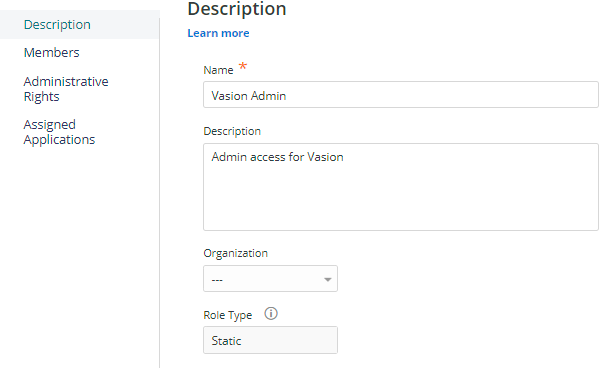
- Select Add Role.
- Name the role Vasion Admin.
- (Optional): Add the Description and Organization.
- Set the Role Type to Static.
- Select Save
- On the left, select Members.
- Add any users that will have admin rights in Vasion Print (formerly PrinterLogic) to this role.
- On the left, select Assigned Applications.
- Select Add, and then locate and Add the App you created.
- Select Save

Map the Role
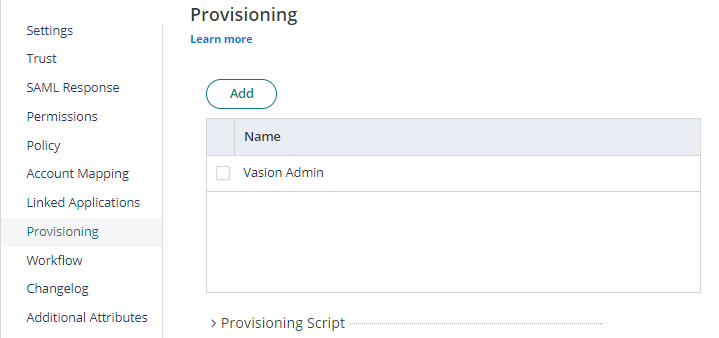
- Navigate back to your CyberArk app and select the Provisioning tab.
- Under Role Mappings, select Add.
- Use the Role drop-down in the Role Mapping window to select Vasion Admin.
- In the Destination Group section, select Add, and select Vasion Admin.
- Select Done.
- Select Save
JIT Provisioning
If you wish to use JIT Provisioning, make sure the JIT option in the IdP Settings modal is checked and do not enable SCIM. Doing so will create duplicate users and impact login and user authentication.
JIT does not support the provisioning of group membership associations, so you cannot apply RBAC roles, printer deployments or portal security roles to groups. All assignments have to be done individually for each user.
When using JIT Provisioning, the application creates users during the first sign-in attempt.
- Access your Vasion Print (formerly PrinterLogic) instance and select Sign in with <IdP Name>.
- Attempt to login with your IdP credentials.
-
This login attempt will fail and return you to the login page.
This is expected. With JIT, this action triggers the user creation in the instance.
- The following login attempt with valid credentials initiates a typical login sequence.
Administrators who need access to the Admin Console still need to be added to the Tools ![]() Users page using the steps in Admin Console Users.
Users page using the steps in Admin Console Users.
7. Add Vasion Print (formerly PrinterLogic) Admins
For steps on assigning users and roles to the Vasion Print (formerly PrinterLogic) Admin Console reference Admin Console Users.
-
Week Ending In Jan 4th, 2025
-
Released: Dec 27th, 2024
-
Released: Dec 23rd, 2024
-
Android/iOS: Dec 23rd, 2024
-
Released: Dec 9th, 2024