We've Moved!
We've unified our Vasion Print (formerly PrinterLogic) and Vasion Automate documentation into a single, streamlined resource to better serve you. Visit our new unified documentation site: docs.vasion.com
Note: This legacy site will not be updated after January 6, 2025, and will remain available for reference until May, after which all traffic will automatically redirect to docs.vasion.com/a/Get_Started/Automate.htm.

Last updated: January 07, 2025
Self-service Portal Setup
Use the processes below to customize the Self-service Portal for your organization.
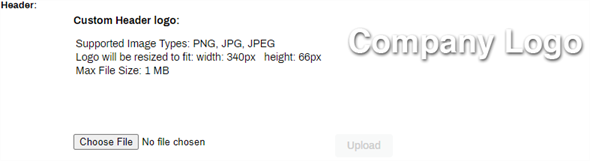
Change Header Image
Upload a company logo or header image to customize the image that displays in the header of the Self-service Portal.
- In the Admin Console, navigate to Tools
 Settings Portal.
 -
In the Header section, select Choose File.
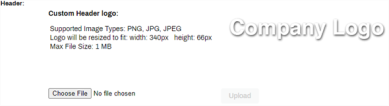
- Navigate to the file that you want to upload.
- Select Open.
- When the path and file appear, select Upload.
- Select Save.
Add Maps
Map images are static in size, and Vasion Print (formerly PrinterLogic) does not auto-adjust the map to the user's computer screen. We recommend 850 x 480 px to work across most monitors, and the maximum file size must be 900 kb or less. Larger files display an error.
Upload a Map
Once you have a floor plan image ready, Select the folder where you want to apply it and select the Map tab.
- Select Upload Background Image.
-
Select Choose File.
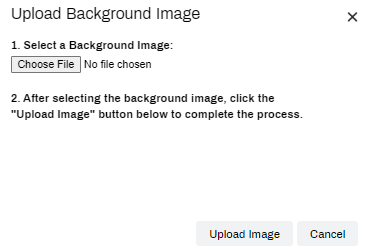
- Navigate to and select the floor plan / map image.
- Select Upload Image.
- Select Save on the top-right corner.

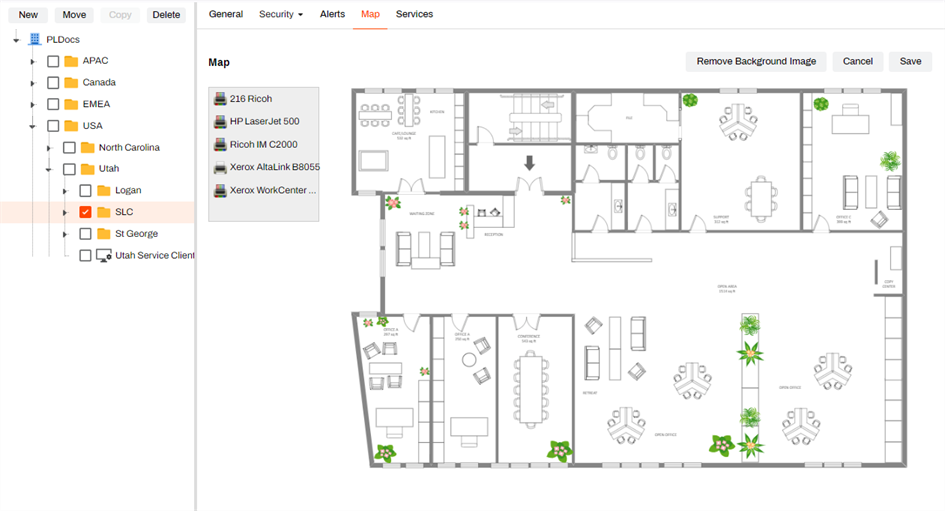
To remove the image, select Remove Background Image and save the change.
Add Printers
Printers within the folder display in the gray box to the left of the map. To place a printer on a map location:
- Drag and drop the printer icon onto the map in the desired location.
- Select Save after printers have been placed.
Adjust printer icons at any time in the Admin Console. When a new printer is added to the folder, it's displayed in the gray box to the left of the map.
The Self-service Portal folder map mirrors the one in the Admin Console.
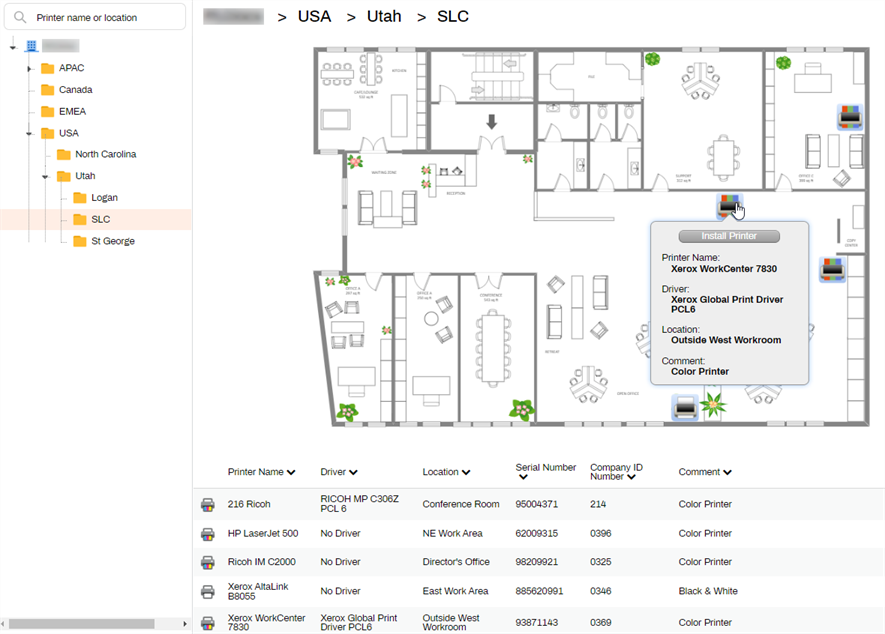
Self-service Portal View
Navigate to the Self-service Portal once the map is ready. Select a folder to see the map. Hover over the printer icon to see additional information about the printer along with the Install Printer button.
Below the map, printers list out the same as folders without maps. Install printers from either the map or list.
Resize Printer Icons
- In the Admin Console tree structure, select a folder that contains the map with the printer icons you want to resize.
- Select the Map tab.
- When the map appears, right-click the printer icon you would like to resize.
- Select the new icon size (small, medium, large).
- Select Save on the top-right corner.
Manually Change Portal Language
Add /?lang=XX to the portal URL, where XX is the two-character HTML language code. See below.
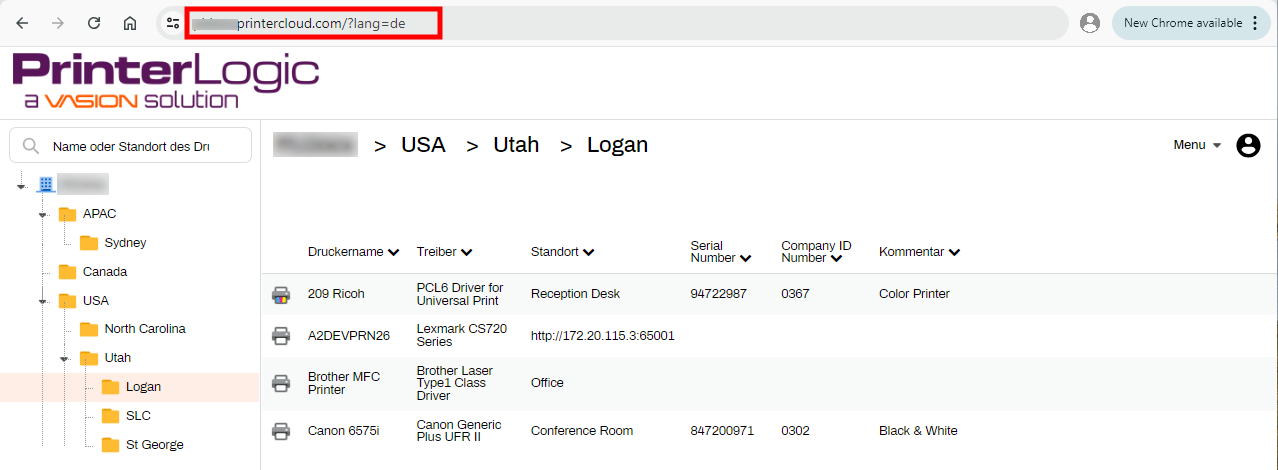
Although other codes may work, the PrintVasion Print (formerly PrinterLogic) supported HTML codes are:
- Chinese (Simplified) - zh-Hans
- Dutch - nl
- English - en
- French - fr
- German - de
- Italian - it
- Japanese - ja
- Polish - pl
- Portuguese - pt
- Spanish - es
- Swedish - sv
- Thai - th
- Turkish - tr
-
Week Ending In Jan 4th, 2025
-
Released: Dec 27th, 2024
-
Released: Dec 23rd, 2024
-
Android/iOS: Dec 23rd, 2024
-
Released: Dec 9th, 2024