We've Moved!
We've unified our Vasion Print (formerly PrinterLogic) and Vasion Automate documentation into a single, streamlined resource to better serve you. Visit our new unified documentation site: docs.vasion.com
Note: This legacy site will not be updated after January 6, 2025, and will remain available for reference until May, after which all traffic will automatically redirect to docs.vasion.com/a/Get_Started/Automate.htm.

Last updated: January 07, 2025
Custom Printer Fields
With Custom Printer Fields you can add additional text fields to further customize printer objects in the Admin Console and the Self-service Portal. When you enable a custom field, the field displays on the General tab of a printer object in the Admin Console, and as a column on the Self-service Portal printer list.
You can use custom fields without showing them on the Self-service Portal. For example, printer serial numbers is not necessarily needed by the end user, but is helpful for administrators.
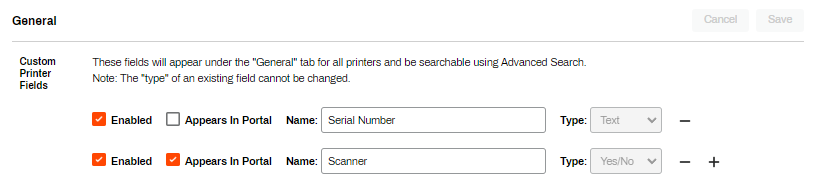
Custom Field Settings
Here is a brief overview of the setting options:
- Enabled
- Select this option to display the field on the General tab in the Admin Console.
- Appears In Portal
- Select this option to display the field as a column for end users to see in the Self-service Portal.
- Name
- Enter a unique name that appears as the label for the field on the General tab, or column heading on the Self-service Portal.
- Type
- Select the type of field from one of the following options:
- Text
- Enter any text for the field value.
- Numeric
- Enter numbers for the field value.
- Yes / No
- Field displays as a check box option.
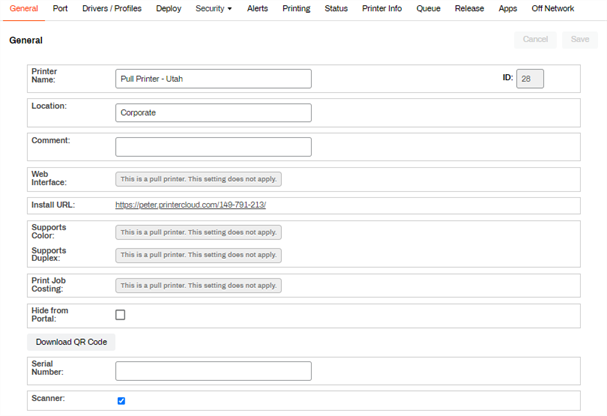
Field Display
Admin Console View
Custom fields are visible at the end of the General tab options.
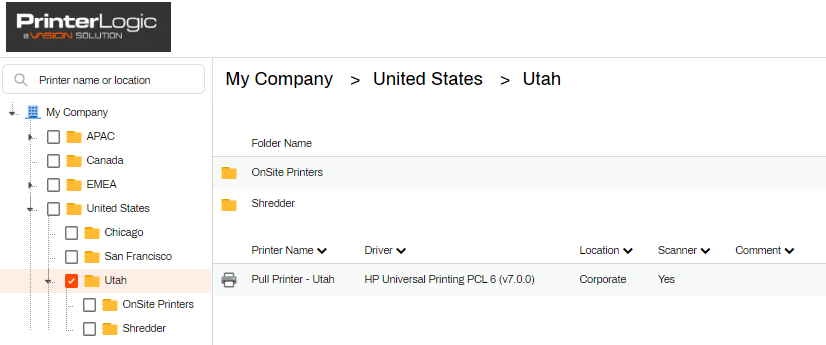
Self-service Portal View
Custom Field displays as a column on the Self-service Portal.
Create a Custom Field
- In the Admin Console, navigate to Tools
 Settings General and scroll down to Custom Printer Fields.
 - Complete the following:
- Name — enter the name you want for the custom field. This displays on the printer object's General tab and on the Self-service Portal.
- Type — use the drop-down to select from the following:
- Text — use this option to use a text description as the value for the field.
- Numeric — use this option if the value for the field consist of only numbers.
- Yes / No — use this option to set a binary option depicted by a check box on the Admin Console. On the Self-service Portal the value displays as Yes or No.
- Check the Enabled box to display the field on the General tab of the printer object.
- Check the Appears on Portal box to display the field on the Self-service Portal.
-
Select Save.
Once you save a custom field, you will not be able to modify the Type.
-
Week Ending In Jan 4th, 2025
-
Released: Dec 27th, 2024
-
Released: Dec 23rd, 2024
-
Android/iOS: Dec 23rd, 2024
-
Released: Dec 9th, 2024