We've Moved!
We've unified our Vasion Print (formerly PrinterLogic) and Vasion Automate documentation into a single, streamlined resource to better serve you. Visit our new unified documentation site: docs.vasion.com
Note: This legacy site will not be updated after January 6, 2025, and will remain available for reference until May, after which all traffic will automatically redirect to docs.vasion.com/a/Get_Started/Automate.htm.

Last updated: December 11, 2024
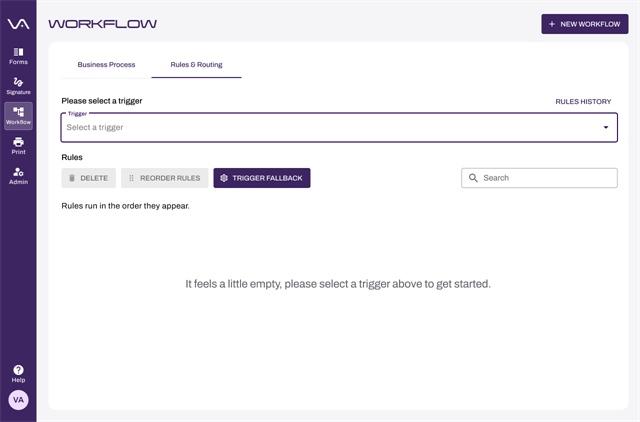
Rules & Routing Overview
Access to Rules & Routing requires the Output Automation add-on and appropriate permissions. As rules are created, they are listed in the table and are executed in the order in which they appear.
To get Output Automation, contact your sales representative or customer success manager.
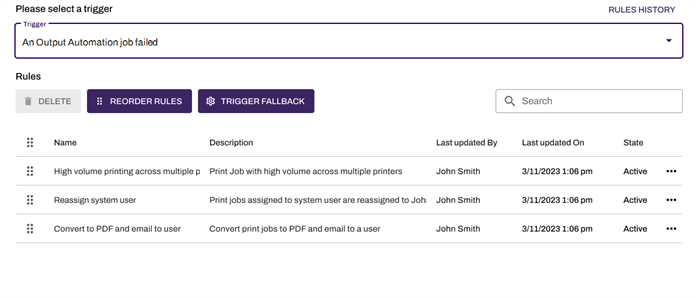
The Rules & Routing tab shows the following:
- + New Workflow— select the button to create a new rule.
- Trigger — drop-down that shows available triggers that initiate rules.
- Toolbar — shows the following buttons:
- Delete — deletes any selected rules.
- Reorder Rules — makes the table rows available for drag and drop functionality.
- Trigger Fallback — ability to manage rule application when there are potential connectivity issues.
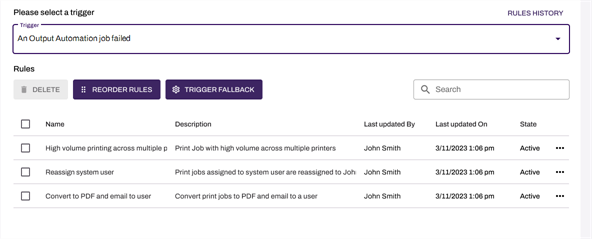
Rule Details
Use the Trigger drop-down to select a trigger from the list. Any rules configured for that trigger display in a table format with the following information:
- Name — the name of the rule.
- Rule — a description of the rule
- Trigger — the event that starts the rule
- Last Updated On — the date and time the rule was created or last updated.
- State — shows if the rule is active or inactive.
- More button — select to see available actions for the rule.
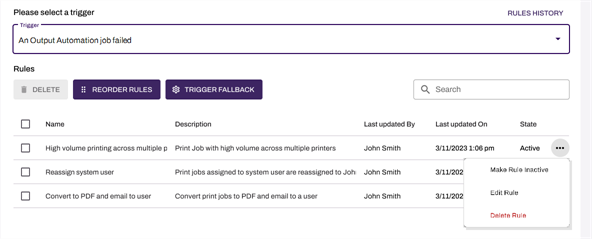
Active Rules
The following options are available for active rules:
- Make Rule Inactive— deactivate the selected rule.
- Edit Rule— change the rule by updating the configuration.
- Delete Rule — delete the selected rule.
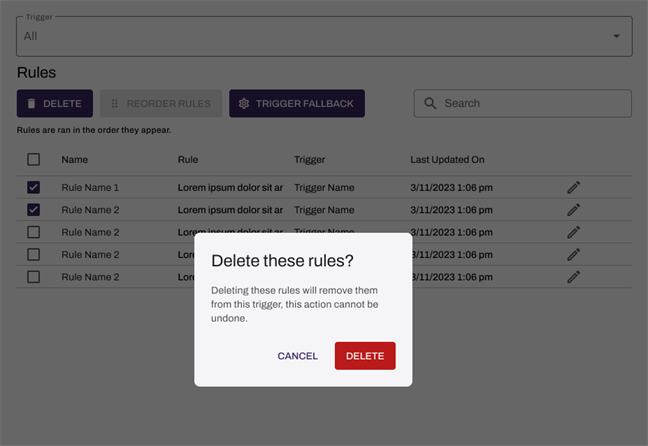
Reorder Rules
Because the rules run in the order they appear in the table, you can change the order and move rules up or down as necessary for your business needs. To learn more, see Rule Order.
- Select the Reorder Rules button.
- When the check box changes to a drag indicator
 you can place the cursor over the indicator.
 - Select and hold the left mouse button to drag the rule up or down.
- Release the mouse button to drop the rule at the desired location.
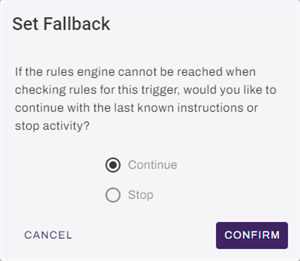
Trigger Fallback
The Fallback is a protective measure that applies to all the rules set for the trigger when there are connectivity issues with the rules engine. Set the option that is best for your business process. For more details, see Trigger Fallback.
- Select the Trigger Fallback button.
- Use the radio button to select from one of the two options:
- Continue — the print jobs are sent to the printer as normal. This action prioritizes print productivity.
- Stop — the print jobs are paused until the connection is restored. This action prioritizes print security.
- Select Confirm.
-
Week Ending In Jan 4th, 2025
-
Released: Dec 27th, 2024
-
Released: Dec 23rd, 2024
-
Android/iOS: Dec 23rd, 2024
-
Released: Dec 9th, 2024