We've Moved!
We've unified our Vasion Print (formerly PrinterLogic) and Vasion Automate documentation into a single, streamlined resource to better serve you. Visit our new unified documentation site: docs.vasion.com
Note: This legacy site will not be updated after January 6, 2025, and will remain available for reference until May, after which all traffic will automatically redirect to docs.vasion.com/a/Get_Started/Automate.htm.

Last updated: December 11, 2024
Create a New Rule
A common use for Rules & Routing is ensuring business continuity so that critical operations are never held up because of printer failure or downtime.
Create a Rule
The workflow designer guides you through the configuration of each rule component.
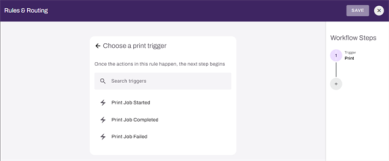
- Choose a print trigger
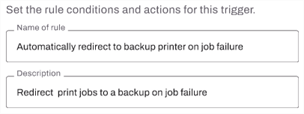
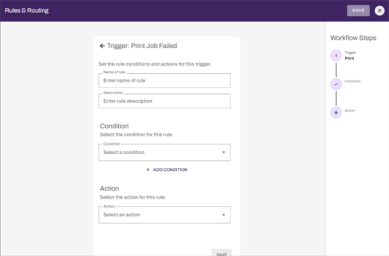
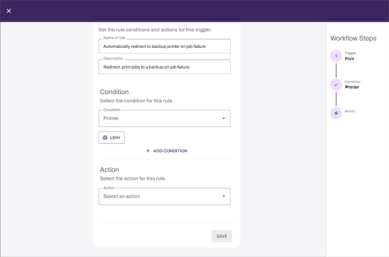
- Name and set conditions
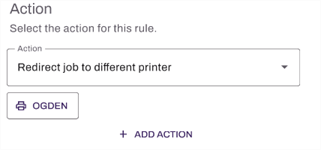
- Select the action(s) for the rule.
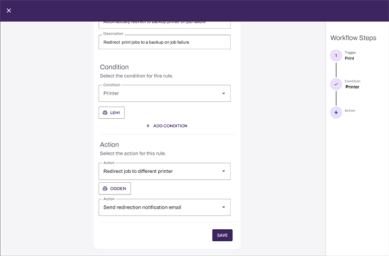
In this example, we're creating a rule that redirects a print job to a backup printer in case the primary printer fails.
1 Choose a Print Trigger
Select + Create New Rule from the top-right corner of the Rules & Routing tab.
2 Name and Conditions
3 Select the Action
When all the steps are configured, select Save. The Save option is only enabled once all the rule components are completely configured.
-
Week Ending In Jan 4th, 2025
-
Released: Dec 27th, 2024
-
Released: Dec 23rd, 2024
-
Android/iOS: Dec 23rd, 2024
-
Released: Dec 9th, 2024

